
Bleed and Trim Marks Explained for Print: Prepare Artwork Correctly
Oct 04, 2026
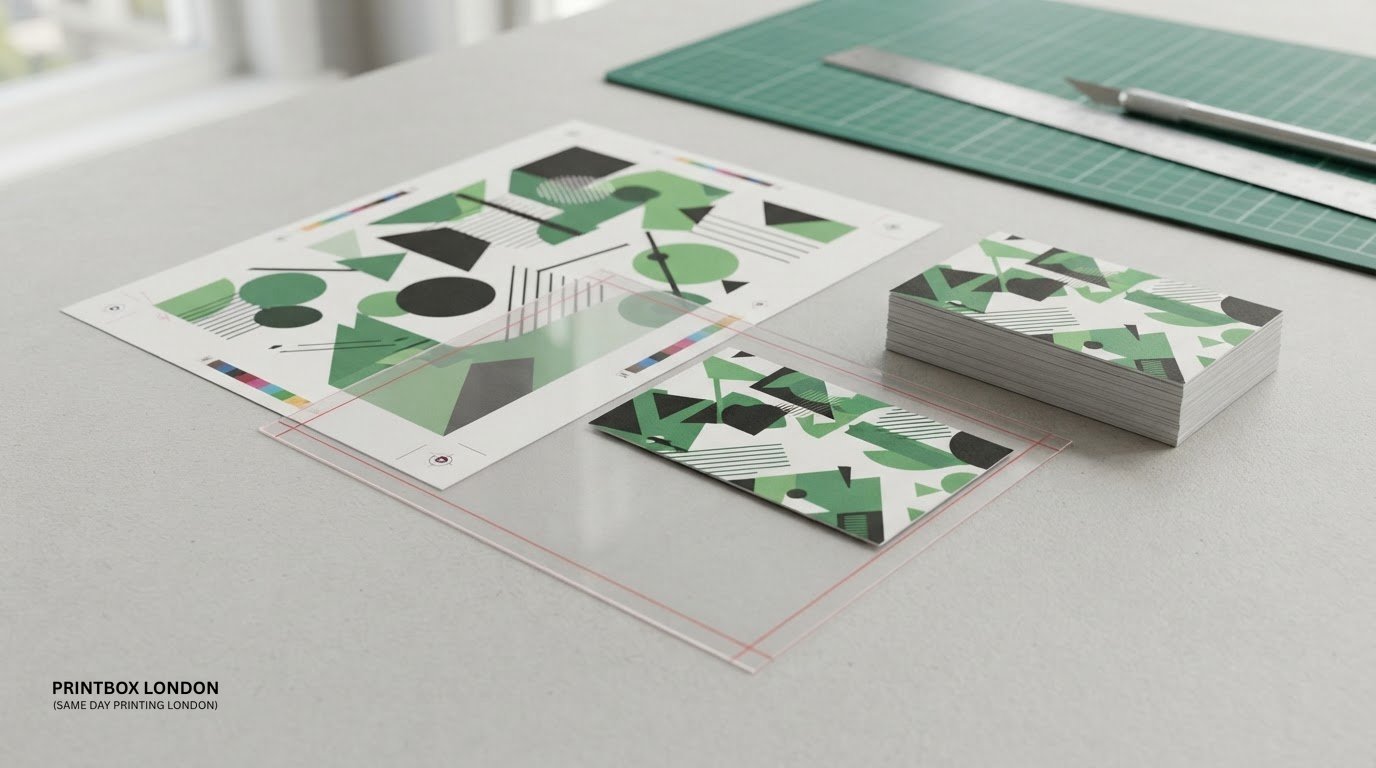
What if artwork that looks perfect on screen leaves a white edge or loses part of its text when printed? If you need bleed and trim marks explained for print, the key is knowing which parts of the file are printed, cut away or kept safely inside the finished edge.
It’s easy to mix up bleed and crop marks, but they do different jobs. Bleed extends background colours or images beyond the trim edge; trim marks show where the cut should fall; and the safe area keeps important details away from that cut. A 3 mm bleed is common, but the right setup can depend on the product and its requirements.
This guide explains how the three areas work and what to check before exporting a print-ready PDF. You’ll learn how to set the finished size, extend artwork correctly, protect text and logos, and avoid common file-preparation issues before sending artwork to Printbox London (Same Day Printing London) for flyers or business cards.
Key Takeaways
- Get bleed and trim marks explained for print, and see how each part helps prepare artwork for the finished cut size.
- Use a clear setup sequence, from confirming dimensions to exporting and inspecting your PDF.
- Check artwork requirements for flyers, business cards and posters individually, as specifications can vary.
- Catch common file issues, including missing bleed, misplaced marks and important text too close to the edge.
- Prepare a clear print handover with the product, size, quantity, sides, material, finishing and required deadline.
Bleed and trim marks explained for print: what each one does
Bleed is extra artwork beyond the intended cut edge. Trim marks show where the sheet is meant to be cut. The finished trim size is the final width and height of the printed item after cutting. These areas have separate roles, and understanding them helps you prepare artwork without unwanted white edges or details placed too close to the cut.
Imagine a flyer with a colour background running right to every edge. The background should continue past the intended finished edge, while the headline and logo sit safely inside it. This gives the cut some room for slight movement without leaving an unprinted sliver or clipping essential content.
What is bleed in printing?
Bleed is the part of the printed artwork that extends beyond the intended trim line so edge-reaching colours or images can be cut to the finished size. If the cut shifts slightly, this extra printed area helps reduce the risk of a narrow white edge appearing. A 3 mm allowance is common, but it isn’t universal. Follow the requirements for the specific product and job.
For example, if a photograph fills the background of a flyer, extend the photograph beyond the trim edge. Don’t extend text or logos into that area. The Bleed (printing) reference provides further background on the term and its use in print production.
What do trim marks and safe areas show?
Trim marks, also called crop marks, are small guides indicating where the printed sheet is intended to be cut. The cut defines the finished trim size. The safe area is an inset zone inside that edge. Keep important text, logos and contact details within it so they’re not clipped or left uncomfortably close to the finished edge.
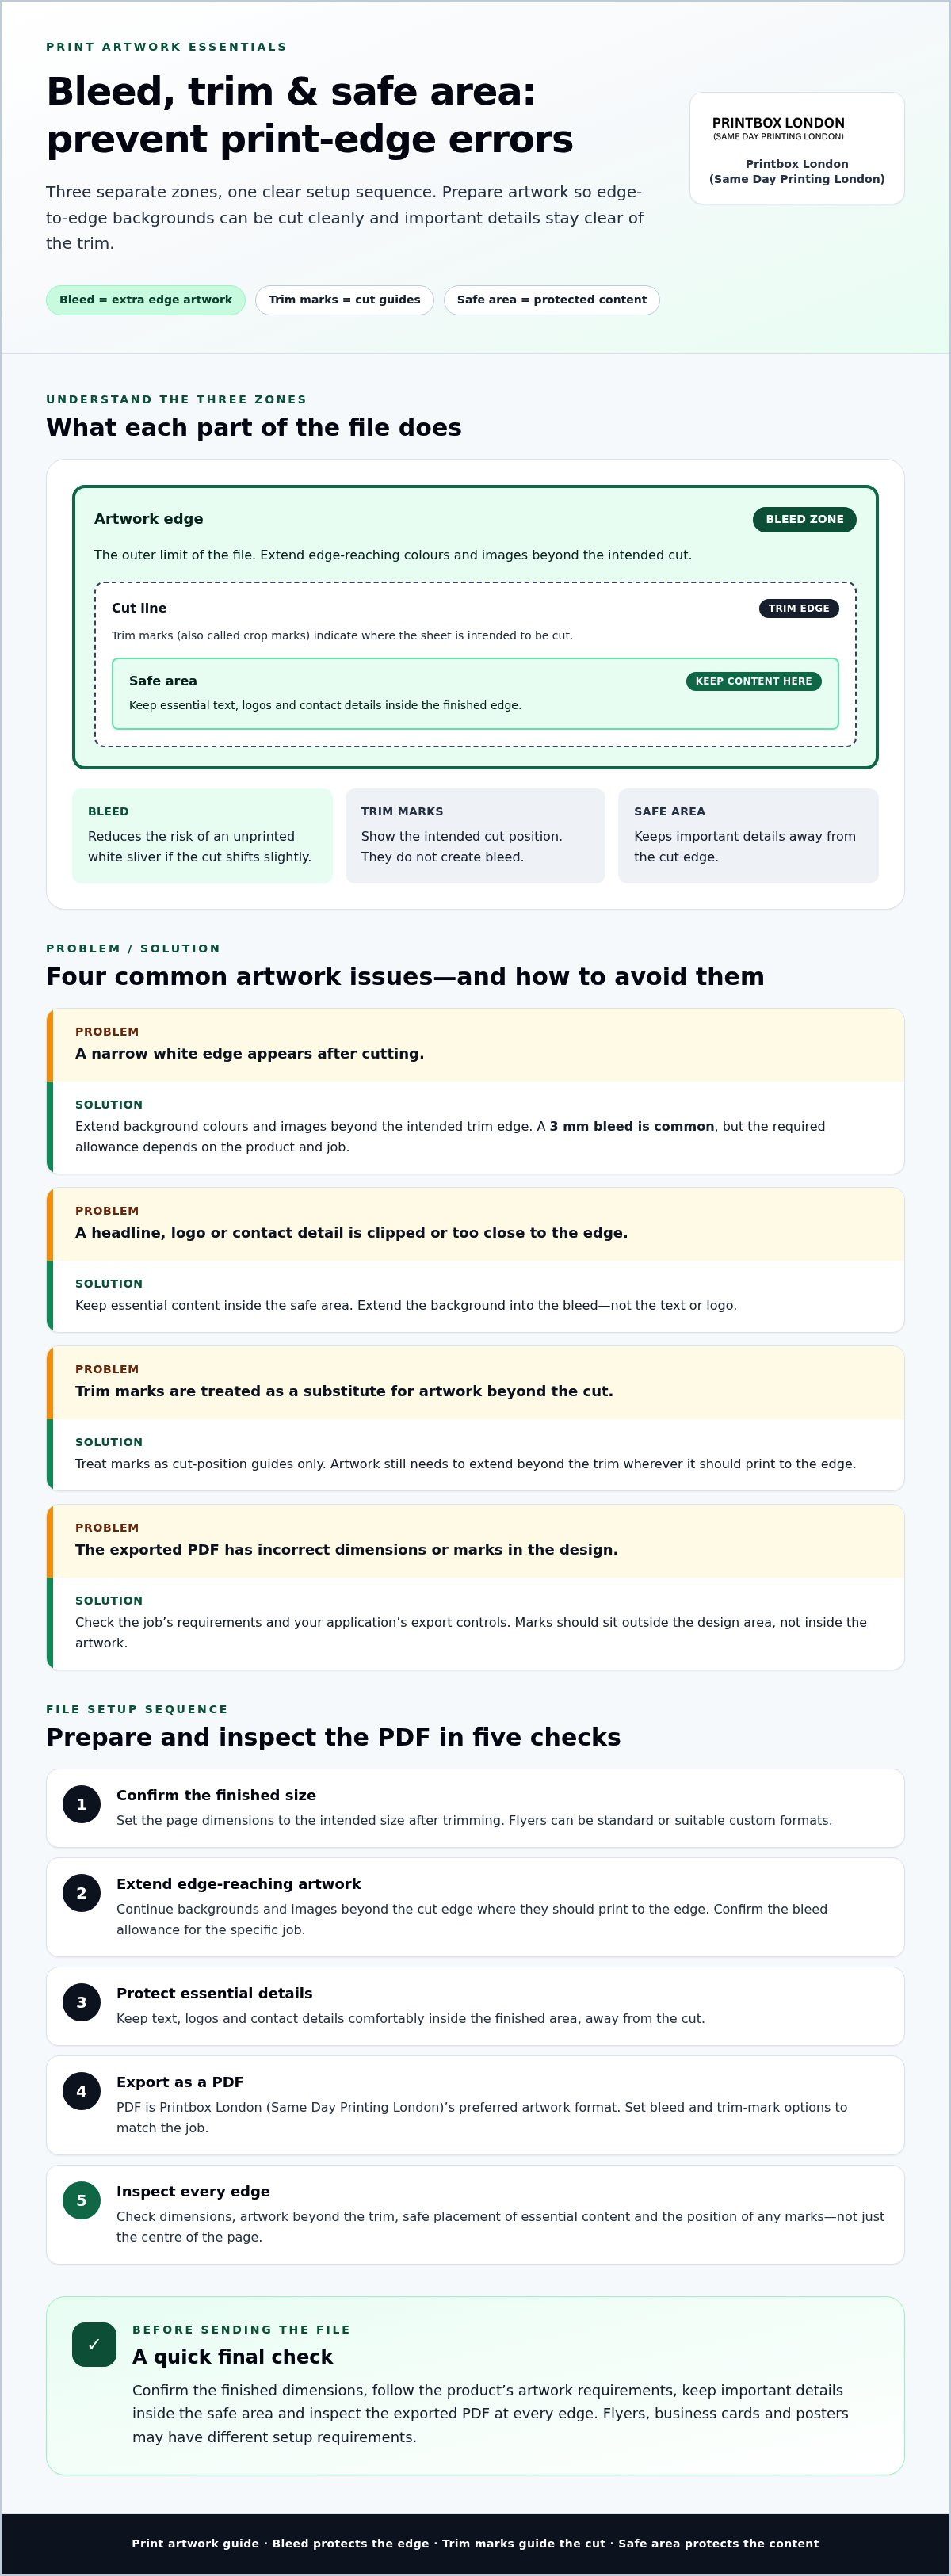
Trim marks don’t create bleed or replace a safe margin. They only indicate the cut position. Think of the artwork as three zones:
Artwork edge: the outer limit of the file, including any bleed.
Cut line: the intended finished edge, shown by trim marks where required.
Safe area: the inner zone where essential content should remain.
In short, bleed protects the outer edge, trim marks guide the cut and the safe area protects the content. Check each area separately when preparing a file for print.
How bleed and trim marks work together on a print-ready file
Prepare the file in order: set the finished dimensions, add bleed where needed, keep important details clear of the cut, then export and inspect the PDF. This workflow helps keep the design, cut position and final size aligned. Document setup and export controls differ between design applications, so check the options in the software you’re using rather than assuming they all work the same way.
- Confirm the finished size. Start with the dimensions the printed item should be after trimming. A flyer can be a standard size or a suitable custom format, so make sure your page size matches the intended finished dimensions.
- Extend edge-reaching artwork. Continue background colours and images beyond the intended cut edge wherever they should print to the edge. A 3 mm bleed is common, but the required allowance depends on the job. Don’t add it automatically without considering the product requirements.
- Protect essential content. Keep text, logos and contact details inside the safe area, away from the cut. For example, on a flyer with a full-bleed background and a headline near the top, extend the background into the bleed but keep the headline comfortably within the finished area.
- Export the PDF. PDF is Printbox London (Same Day Printing London)’s preferred artwork format. Set bleed and trim-mark options according to the specific job and your application’s export controls. Marks are guides, not substitutes for artwork extending beyond the cut.
- Inspect the exported file. Open the PDF and check that the finished dimensions are correct, edge artwork continues beyond the trim line, important content remains inside it, and any marks sit outside the design. Look at every edge, not just the centre of the page.
Export settings can affect what appears in the PDF. Some applications let you choose whether to include trim marks or bleed; the wording and location of these controls vary. Follow the requirements for the print job, and avoid adding marks inside the artwork area where they could appear on the finished item.
The Graphic Design and Print Production Fundamentals textbook provides broader context on design and print production. For a flyer order, a clearly labelled PDF and an agreed finished size make the handover easier to understand. See flyer and leaflet printing for the relevant service.
Bleed and trim marks for flyers, business cards and posters
The principles behind bleed and trim marks explained for print apply across all three formats, but the artwork setup isn’t automatically identical. Start with the intended finished dimensions, then consider the design, material and any finishing. Those details can affect how much space is needed beyond the cut and how far essential content should sit inside it.
When flyers or business cards have artwork to the edge
For a flyer with a full-colour background, extend that background beyond the intended cut edge. Keep headlines, contact details and logos comfortably inside the finished area. A design may use standard or custom dimensions, so confirm the final size before setting up the artwork. If you’re weighing up A5 and A6, consider how much room the message and imagery need rather than choosing by size name alone. See flyer and leaflet printing for product information.
Business cards need the same edge-to-edge care. If a colour or image is intended to reach the edge, carry it beyond the cut line; keep names, email addresses and logos away from that boundary. Check the finished card dimensions and any finishing requirements before exporting. A layout that looks safely spaced on screen can feel crowded once trimmed, so review the design at its intended final size.
How poster artwork differs from small-format print
Posters follow the same basic edge principle: artwork intended to meet the finished edge should extend beyond it, while key wording and logos stay within a safe margin. Don’t assume the poster must be an A-series size. Confirm the actual finished dimensions, including any suitable custom size, before preparing the file.
Image quality also deserves attention. A picture that looks sharp when viewed small on screen may appear soft when enlarged, so inspect it at the intended poster dimensions. The required setup can vary with the material and finishing, just as it can for smaller print. Adobe’s guidance on setting up a print bleed is useful for understanding the file-preparation controls in InDesign; requirements still depend on the print job.
For each format, check the finished size, edge artwork, safe placement of important content and any product-specific instructions before sending the PDF. Printbox London (Same Day Printing London) provides poster printing in a range of formats, with suitable A-series and custom dimensions possible where production allows.
How to check bleed, trim marks and safe areas before sending artwork
A quick preflight can catch the small file errors that lead to white edges, cut-off details or confusing print instructions. Requirements vary by product and specification, so use the checklist below alongside the artwork guidance for your particular job. Don’t assume one bleed allowance or mark setting suits every order.
A quick artwork checklist before export
- Finished size: Check the page dimensions against the size you want after trimming. Confirm the orientation and whether the layout is single- or double-sided.
- Bleed: If a colour or image should reach the finished edge, make sure it extends into the required bleed area. A common allowance is 3 mm, but it isn’t universal.
- Safe area: Keep essential text, logos and contact details inside the trim edge. Check every side, including the top and bottom.
- Trim marks: If marks are required, ensure they indicate the intended cut and sit outside the artwork rather than crossing into the design.
- Product requirements: Check the setup for the specific item, size, material and finishing. These details can affect the file requirements.
Three errors deserve a close look. Missing bleed can leave an unprinted sliver where an edge-to-edge background meets the cut. Trim marks placed inside the design can appear on the finished print. Text too close to the cut may be clipped or left looking uncomfortably near the edge.
Review the exported PDF before sending it
PDF is the preferred artwork format at Printbox London (Same Day Printing London), provided the file is correctly prepared. Open the exported PDF rather than relying only on the design preview. Check each edge at a useful zoom level, confirm the background continues where intended, and make sure text and logos remain clear of the trim area.
Also check for missing or substituted fonts, low-resolution images and marks that weren’t meant to be included. If the PDF has more than one page or side, inspect each one. A file can look right at a glance but reveal a problem near an edge when viewed closely.
For broader flyer file-preparation guidance, see flyer and leaflet printing. A careful final review helps make the handover clearer, though artwork still needs to match the requirements of the specific print job.
Sending bleed-ready artwork to Printbox London (Same Day Printing London)
A clear handover pairs the artwork with the details needed to understand the job. Even a carefully prepared PDF needs to match the product and specification, so include the key information rather than relying on the file alone.
What information to include with your print-ready file
Send the final artwork as a PDF where possible, then state:
- Product type, such as flyers, business cards or posters.
- Finished size and quantity.
- Printed sides, single- or double-sided.
- Paper or material and any finishing required.
- Required deadline, plus your collection or delivery preference.
These details help distinguish jobs that may use similar artwork but need different setups. For example, a custom-size flyer and a business card have different finished dimensions, even if both use edge-to-edge colour. Make sure the PDF reflects the agreed finished size, and that the bleed and trim marks explained for print in this guide are applied according to the requirements for your particular job.
A practical next step for London print jobs
Same-day printing is available for selected quantities and specifications. The turnaround for an order depends on its quantity, size, material, finishing, artwork readiness, stock and current workload, so avoid treating a required deadline as a confirmed completion time until the order is agreed.
For collection, wait until the order has been confirmed ready before travelling to the Tottenham shop. If you have a deadline, include it with the artwork and job details so it’s clear from the start. A complete handover helps identify what you need and reduces avoidable back-and-forth, but it doesn’t mean every file is automatically ready to print without review.
Send the product type, finished size, quantity, sides, material, finishing, deadline and final artwork to contact Printbox London (Same Day Printing London) about your print job.
Get your artwork ready for print
Bleed, trim marks and safe areas each have a clear job: bleed extends edge artwork, trim marks indicate where the cut should fall, and the safe area keeps important details clear of that edge. Check the finished dimensions and requirements for your specific product, then inspect the exported file before sending it. That’s bleed and trim marks explained for print, with the key checks in place.
PDF is the preferred artwork format for Printbox London (Same Day Printing London). Include your product, finished size, quantity, printed sides, material, finishing and required deadline when sharing your job details. Same-day printing is available for selected quantities and specifications. If collecting, wait until your order has been confirmed ready at the Tottenham shop.
A clear file and complete brief are a practical start. Prepare your artwork, share the job details, and take the next step with confidence.
Frequently Asked Questions
Are crop marks and trim marks the same thing?
Yes. Crop marks and trim marks are names for guides showing where a printed sheet is intended to be cut. They indicate the finished edge, but they don’t create bleed or protect important content from being cut. Bleed is extra artwork beyond the cut line; a safe area is space inside it for text and logos. The terms are often used interchangeably in print-file discussions.
How much bleed should I add to a print file?
A 3 mm bleed is common, but it isn’t a universal setting. The right amount depends on the product and its production requirements, so check the guidance for the specific job before exporting. Add bleed only where artwork is meant to continue to the finished edge. Don’t confuse the bleed allowance with the safe area, which sits inside the trim line.
Do I need trim marks on every print-ready PDF?
No. Trim marks aren’t required on every print-ready PDF. Whether to include them depends on the product and the file requirements. If marks are needed, they should show the intended cut and sit outside the finished artwork, not across the design. A correctly prepared PDF without marks may suit some jobs. Check the relevant print instructions rather than adding marks by default.
Can I print without bleed if my design has a white border?
Often, an intentional white border is part of the design rather than an area that needs background bleed. Make sure the white border is clearly included in the artwork and that important text or logos aren’t too close to the trim edge. This differs from an edge-to-edge coloured background, which needs artwork extending beyond the cut to help avoid an unintended white sliver.
How do I add bleed and trim marks in Canva?
Canva’s document and export controls can vary, so look for the available print or bleed settings in your current design and export options rather than relying on a universal menu sequence. Follow the requirements for the specific print job. After exporting, open the PDF and inspect its edges: check that edge-reaching artwork extends as intended, content is clear of the cut, and any marks are correctly placed.
Will a printer add bleed or trim marks to my artwork?
Don’t assume a printer will add bleed or trim marks to every file. Artwork may need adjustment depending on the design and job requirements, and adding bleed can’t recreate background artwork that isn’t there. Send the final artwork with the product type, finished size and other print details for review. For print orders in London, a clear specification helps assess whether the PDF is ready for production.
Article by
Printbox London Team
The Printbox London (Same Day Printing London) team provides practical printing guidance based on real customer requirements and day-to-day print production. We serve customers across Greater London from our Tottenham print shop, with same-day printing available for many products depending on quantity, specification, artwork and production capacity.