
Vinyl Window Sticker Application Guide: How to Apply Stickers Smoothly
Oct 14, 2026
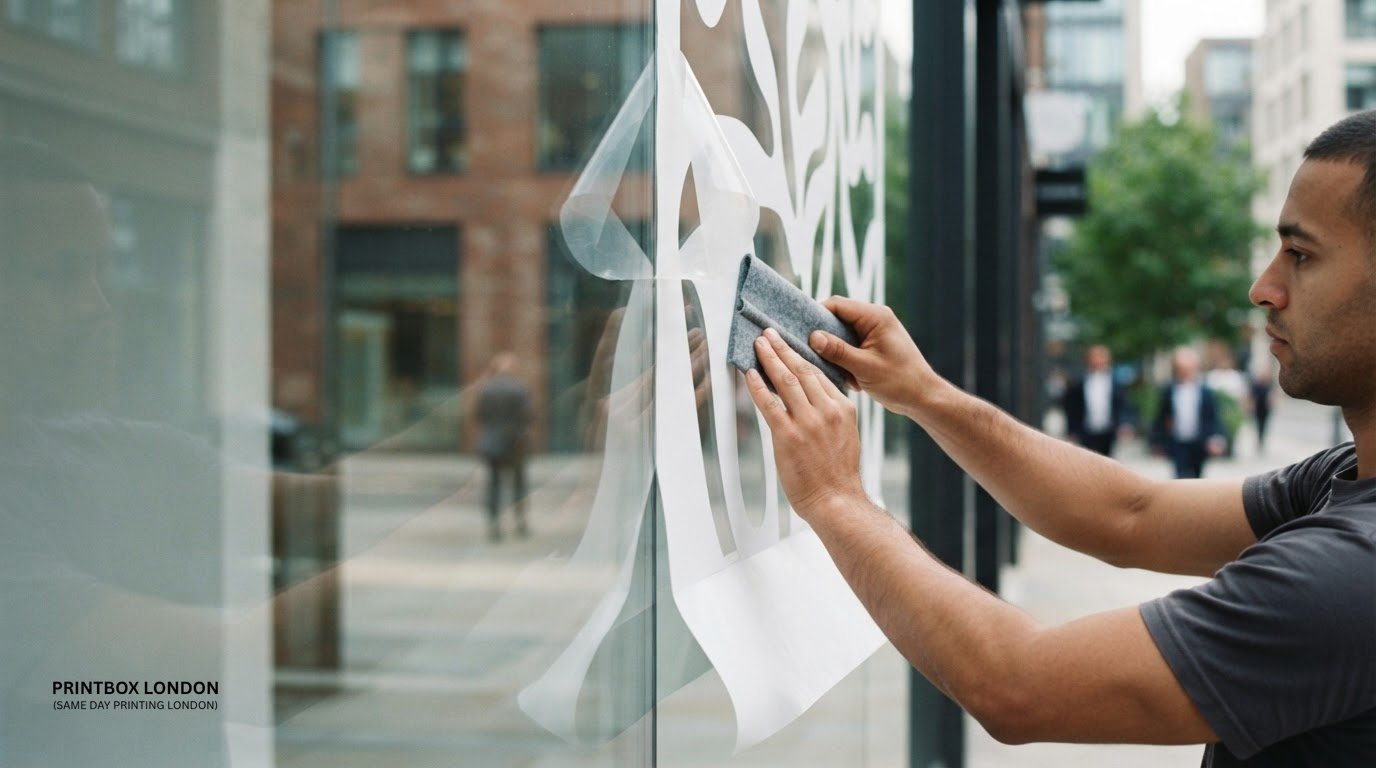
What if the key to a smooth window sticker isn’t pressing harder, but getting the order right? It’s easy to hesitate over which layer to peel, or worry that one speck of dust will leave a bubble. This vinyl window sticker application guide starts with the sticker type, so you know what to handle before it touches the glass.
A neat finish comes from a few controlled steps. Clean and dry the window, check how the backing and any transfer tape work, then position the design before applying steady pressure. That matters even more with a large sticker, where a small tilt at the start can become harder to correct as you go.
Follow this guide to prepare the glass and sticker, line up the design, and smooth it down without trapping air or creating wrinkles. You’ll also learn what to do if the sticker shifts or a bubble appears, rather than making the problem worse. Printbox London (Same Day Printing London) prints custom vinyl window stickers for businesses, and clear artwork and product details help get an order moving.
Key Takeaways
- Check the backing, transfer layer and product instructions before peeling, so you handle the sticker in the right order.
- This vinyl window sticker application guide shows how to position a design carefully and apply it in controlled stages.
- Spot whether a bubble, wrinkle, lifting edge or crooked position needs attention, then choose a suitable next step.
- Check the viewing direction, window frames, handles and sightlines before settling on a position.
- For a custom window sticker, prepare the finished size, quantity, shape, artwork and intended placement before ordering.
Before applying a vinyl window sticker, identify its type
Before peeling anything, check the backing, any transfer layer and the product instructions. A vinyl sticker may arrive as a complete design on a sheet, or as separate elements held together for application. The layers determine what stays on the glass and what you remove, so don’t assume every sticker follows the same sequence.
The sticker’s construction determines the right application sequence, so identify its layers before you peel or press. Size and manufacturer guidance matter too. A method that suits one design may not suit another, and wet application isn’t a universal step. Follow the instructions supplied with your sticker if they differ from general advice.
Transfer decals and sheet-style stickers: what is the difference?
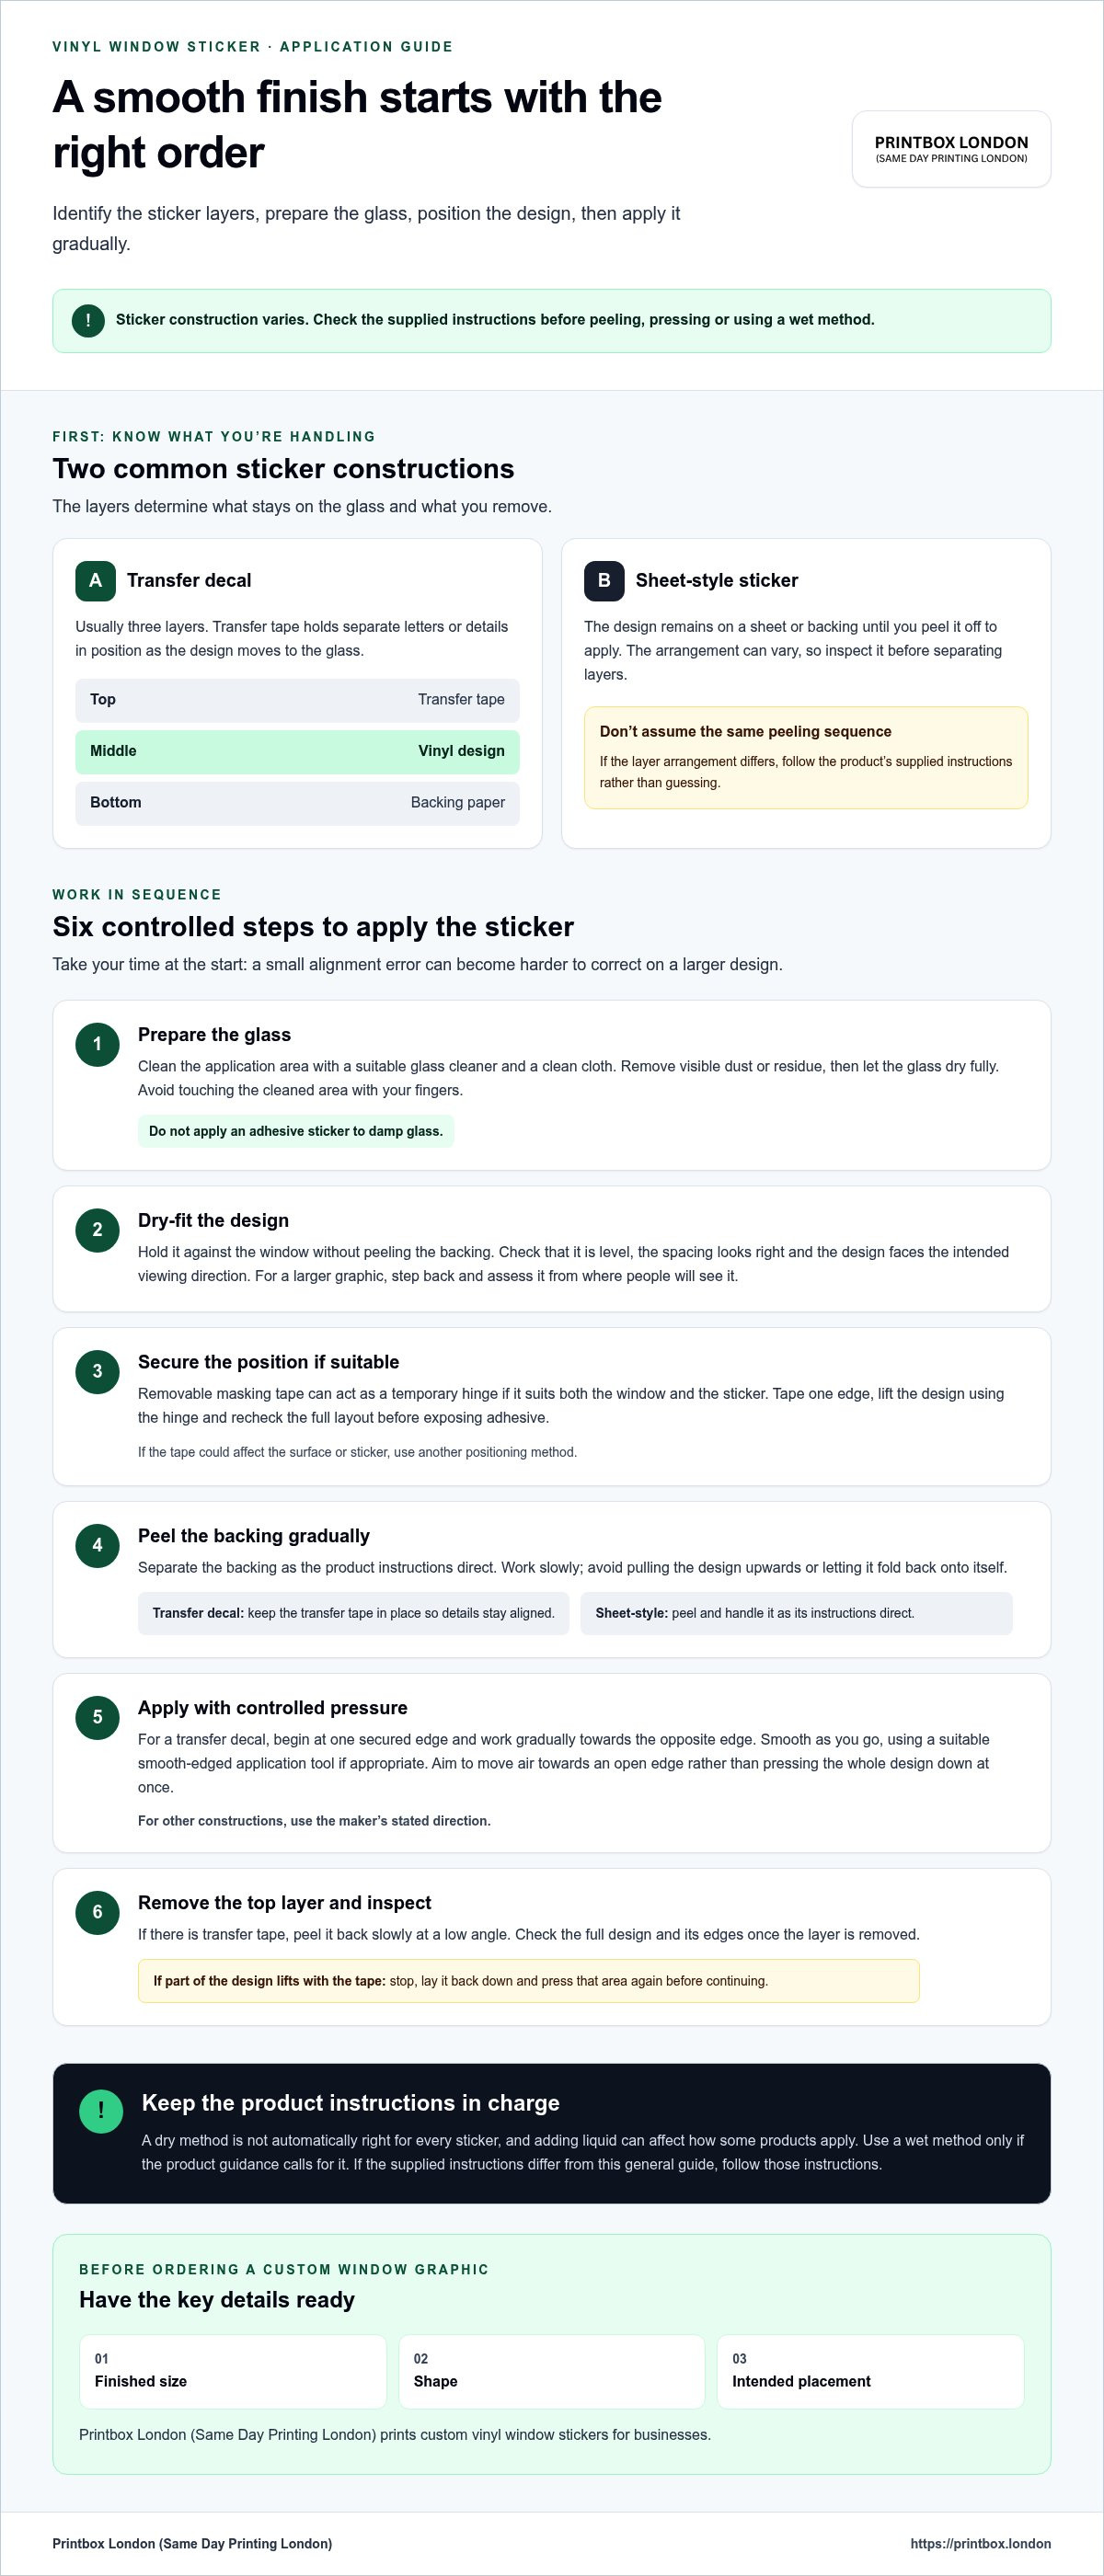
A transfer decal usually has three layers: backing paper underneath, the printed vinyl design in the middle, and transfer tape over the top. The tape holds the design in place as it moves from the backing to the glass. This is useful for separate letters or detailed artwork that could shift out of alignment if handled individually.
A sheet-style sticker is different: the design remains on a sheet or backing until you peel it off to apply. The arrangement can vary, so look closely before separating any layers. For a general overview of sticker types and uses, see What is a Sticker? If your product has a different layer arrangement, use its supplied instructions rather than guessing.
Check the window, design and working area first
Choose a clean, accessible section of glass with enough room to hold and position the full design. Clear the surrounding area so you can move without catching the sticker on a frame, handle or nearby object. Use a clean cloth and suitable glass cleaner, then let the glass dry fully before applying an adhesive sticker.
Check the design’s orientation and intended viewing side before removing any backing. A design intended to be read from outside may need a different orientation from one viewed from inside. Hold it against the window first and check that it sits where you want it. A smooth-edged application tool can help press the design down, if appropriate for the sticker and its instructions.
For custom window graphics, clear details such as finished size, shape and intended placement help Printbox London (Same Day Printing London) prepare the print. The custom stickers and labels page covers options for a window display.
This vinyl window sticker application guide starts with the layers for a reason: once you know what you have, you can prepare the glass and follow the correct sequence without pulling away the wrong part.
How to apply a vinyl window sticker step by step
Work in sequence: dry-fit the design, check the instructions, then expose and apply only the layers your sticker’s construction requires. The process below is a practical guide, not a substitute for the maker’s directions. If those specify a different method, follow them, especially for a large design or an unusual layer arrangement.
- Prepare the glass. Clean the application area with a suitable glass cleaner and a clean cloth. Remove any visible dust or residue, then let the glass dry fully. Don’t apply an adhesive sticker to damp glass, and avoid touching the cleaned area with your fingers.
- Dry-fit the design. Hold the sticker against the window without peeling its backing. Check that it’s level, that the spacing looks right and that the design faces the intended viewing direction. For a larger graphic, step back and assess it from the position where people will see it, not just from directly beside the glass.
- Secure the position if suitable. Removable masking tape can act as a temporary hinge if it’s suitable for both the window and sticker. Apply it along one edge, then lift the design using the hinge to check the placement. Recheck the full layout before exposing any adhesive. If the tape could affect the surface or sticker, use another positioning method.
- Peel the backing gradually. Follow the product instructions to separate the backing paper from the sticker. Work slowly and avoid pulling the design upwards or letting it fold back onto itself. For a transfer decal, keep the transfer tape in place so the individual letters or details remain aligned. With a sheet-style sticker, peel and handle it as its instructions direct.
- Apply with controlled pressure. For a transfer decal, start contact at one secured edge and work gradually towards the opposite edge. Smooth the design as you go, using a suitable smooth-edged application tool if appropriate. For other sticker constructions, use the maker’s stated direction. Aim to move air towards an open edge rather than pressing the whole design down at once.
- Remove the top layer and inspect. If the sticker uses transfer tape, peel it back slowly at a low angle. If part of the design lifts with the tape, stop, lay it back down and press that area again before continuing. Check the edges and the full design once the layer is removed. Don’t rush a section that hasn’t adhered as expected.
A dry method is not automatically right for every sticker, and adding liquid can affect how some products apply. This vinyl window sticker application guide keeps the maker’s instructions at the centre of the process, so don’t use a wet method unless the product guidance calls for it.
For a custom window sticker, having the finished size, shape and intended placement ready can help clarify the print specification. Discuss your window sticker requirements with Printbox London (Same Day Printing London).
Bubbles, wrinkles and lifting edges: fix common application problems
Stop as soon as the finish looks wrong. Look closely at the affected area and work out whether you’re dealing with trapped air, a crease, an edge that hasn’t adhered or a design that’s out of position. The right response depends on the sticker and how far application has progressed. Pause, identify the cause and avoid forceful pulling that could stretch the design.
What to do when air or wrinkles appear
A small air bubble may respond to gentle pressure, but results depend on the sticker and its instructions. If the air is accessible, use a smooth-edged tool to guide it towards the nearest open edge. Keep the pressure light and controlled. Don’t press harder if the bubble stays put, as this could mark or distort the design.
- Small air bubble: If it sits near an unsealed edge, gently guide it outwards with a suitable smooth tool. A bubble enclosed by applied vinyl may not be removable without affecting the finish. Don’t assume every mark can be corrected.
- Wrinkle or crease: Stop smoothing and check the product guidance. Don’t sharply pull or stretch the vinyl to flatten a crease. If transfer tape is still attached, follow its instructions for repositioning; if the sticker is already firmly on the glass, avoid repeatedly peeling it back.
Some sticker instructions may explain how to handle tiny bubbles or whether to leave them alone. Follow that guidance rather than trying a pin, blade or other sharp tool. Puncturing the vinyl can leave a visible mark or damage the printed design, so only do it if the maker specifically recommends it.
When an edge lifts or the sticker sits crooked
An edge that lifts during transfer tape removal needs a pause, not a faster pull. Lay the tape back down over the lifted part and press gently through it, then resume slowly. If an edge lifts after the design is on the glass, avoid repeatedly peeling it up to reposition it. That can distort fine details or introduce dust beneath the adhesive.
- Lifting design: If transfer tape is still attached, press the raised area back against the glass before continuing. Peel the tape slowly and stop again if another part lifts.
- Crooked placement: If you spot the angle before the design is fully applied, stop and follow the maker’s advice on repositioning. Once the adhesive has made firm contact, don’t force a correction by pulling the sticker across the glass.
- Badly misaligned or damaged sticker: Stop rather than stretching, scraping or repeatedly lifting it. Check the product instructions for the next step.
This vinyl window sticker application guide can help you respond calmly, but no single fix suits every construction. For another custom design, clear details about size, shape and intended placement help Printbox London (Same Day Printing London) prepare custom stickers and labels for a window display.
Plan window sticker placement and care for a neat finish
Plan the position before applying the sticker. A shop-window design needs to work from the right viewing direction, stay clear of obstructions and suit how the window is used each day. A few checks before you commit can help avoid covering important text or placing the graphic where it’s hard to see.
Choose a visible, practical position
Decide whether the design should be read from outside or inside. If people need to read it from the pavement, check its orientation from outside before application. If customers will view it from inside, check it from that side instead. Where both views matter, make sure the artwork and intended placement suit that purpose.
For a shopfront, assess the position from the pavement and from inside the premises. Check that frames, handles and other features won’t cut across essential wording or artwork. Consider the window’s everyday use too: a sticker placed over a frequently used handle or opening section may be awkward, while a message tucked behind a frame may be hard to read.
Stand back and look at the design in context. Does it sit comfortably within the available glass? Can people see the key message without needing to move around an obstruction? For a larger graphic, check its alignment with the window frame and the other visible elements of the shopfront. Make these decisions before exposing the adhesive.
Care for the finished sticker and know when removal needs care
Once applied, let the sticker settle for the period stated in its instructions before cleaning the glass. Don’t assume every sticker has the same care requirements. For routine cleaning, use a soft cloth and take care around the edges. Avoid abrasive tools, aggressive scraping and solvents unless the maker says they’re suitable, as these could mark the glass or damage the printed design.
Think about the window’s exposure before choosing a sticker for a particular display. Sunlight, moisture and regular cleaning can affect suitability, so match the product to its intended setting and follow the maker’s guidance. The waterproof sticker printing guide explains considerations around exposure and sticker suitability.
Removal needs care as well. Follow the sticker maker’s method, since adhesives and sticker constructions can differ. Don’t assume a sticker will lift cleanly by pulling one corner, and avoid scraping at it with a sharp tool. If you’re unsure of the recommended approach, check the product instructions before starting.
Use this planning stage to make the display work for the people who need to read it, not just for the person applying it. A well-positioned custom design can make the message clearer without interfering with the window’s use.
Get custom vinyl window stickers printed for your London display
A clear specification helps turn your window display idea into a print-ready order. Before requesting custom vinyl window stickers, decide where the design will sit, which way it should face and how large it needs to appear from the intended viewing position. Once the display plan is settled, gather the details needed to prepare the print.
Prepare artwork and order details
Have these details ready:
- Finished size: Give the intended width and height, and say whether you’re measuring the whole design or an individual element.
- Quantity and shape: State how many stickers you need and whether you want a standard or custom shape.
- Window placement: Explain whether the design will be applied inside or outside the glass, and which side people should read it from.
- Artwork: A print-ready PDF is preferred. Check that it reflects the intended size and orientation. Requirements can vary by product, so don’t assume one set of file specifications suits every sticker.
For file checks, consult the sticker artwork preparation guide. The custom sticker printing guide can help with related format choices.
Arrange printing and collection without assuming a deadline
Printbox London (Same Day Printing London) prints vinyl and window stickers, including custom sheet-based shapes and sizes. Same-day printing is available for selected quantities and specifications. Turnaround depends on the order requirements, including quantity, material, finishing, artwork readiness, stock and production workload.
Collection is from the Tottenham shop once the order is confirmed ready. If you have a deadline, include it with the finished dimensions, quantity, shape, artwork and intended window placement when arranging the job. These details help establish the print specification and timing requirements.
A prepared brief gives the design a clear route from artwork to shopfront display.
Put your next window display into action
A window sticker can do more than carry a message. It can help give your shopfront a consistent look across different panes or future display updates. If you’re planning more than one, keep a simple record of the placement and alignment that works, so you have a useful reference for the next design.
Keep this vinyl window sticker application guide nearby when you’re ready to put a new display in place. A little planning before the print is made can help your design fit the window and the way customers see it.
Take the next step with a clear brief, and bring your shopfront idea to life with confidence.
Frequently Asked Questions
Can you apply a vinyl window sticker with soapy water?
Only if the sticker’s instructions allow wet application. Before using soapy water, check whether the product is intended for a wet or dry method and whether the instructions specify a particular solution. Don’t substitute a homemade mixture for a recommended product. If guidance is missing, avoid wetting the sticker and seek clarification from the supplier before application, especially for a large design that would be difficult to replace.
Should a window sticker go on the inside or outside of the glass?
Use the side specified for the sticker and the way it needs to be viewed. Also consider what the window is exposed to: a sticker on the outside faces the weather, while one inside is viewed through the glass. If the design must be readable from outdoors but applied inside, confirm that the artwork is prepared for that arrangement before printing, as the orientation may need to be reversed.
How do you remove a vinyl window sticker without damaging the glass?
Follow the maker’s removal instructions and avoid scraping with a blade or abrasive pad. Don’t assume a household solvent is suitable; it could affect the sticker, nearby frames or glass treatments. If residue remains after the sticker is removed, check which cleaning products are safe for the window before using them. Work gradually, and stop if the glass or its surrounding finish appears to be affected.
Why is my vinyl window sticker not sticking to the glass?
Possible causes include a surface coating, condensation, residue or contact with the adhesive during handling. Check the window and sticker instructions, and consider whether the glass has a treatment or film that could affect application. Avoid adding glue or another adhesive, which may damage the sticker or leave residue. If the surface seems clean but the sticker still lifts, ask the supplier for product-specific advice.
Can vinyl window stickers be applied in cold weather?
Check the product instructions for temperature and environmental limits before starting. Cold glass, condensation or changing indoor and outdoor conditions may affect whether the sticker applies as intended, but there isn’t one temperature rule that suits every product. If conditions fall outside the maker’s guidance, wait for a suitable time rather than trying to compensate with extra pressure or an unapproved heating method.
Can I reposition a vinyl window sticker after putting it on?
Repositioning depends on the sticker’s construction and instructions. If you’re still planning the layout, make a paper template the same size as the design and use it to check the position before application. Once the sticker has made contact, don’t assume it can be moved cleanly. Repeated attempts can alter the design or leave it unsuitable for reuse, so follow the maker’s advice before lifting it.
How can I tell if a window decal uses transfer tape?
A transfer decal often has a top layer covering the design, with individual letters or shapes held together beneath it. That carrier layer is distinct from the backing underneath. Packaging or application instructions may name transfer tape or transfer film. Check those before peeling; don’t lift a corner simply to identify the layers, as that could separate parts of the design prematurely.
What details should I provide when ordering custom window stickers in London?
Give the finished dimensions, quantity, shape, artwork and intended window placement, including which side should face the viewer. For a multi-pane shopfront, specify the size of each pane the design will cover rather than relying on the overall window measurement. Include any deadline and collection preference too. A print-ready PDF is preferred, though file requirements can vary with the product and specification.

Article by
Printbox London Team
The Printbox London (Same Day Printing London) team provides practical printing guidance based on real customer requirements and day-to-day print production. We serve customers across Greater London from our Tottenham print shop, with same-day printing available for many products depending on quantity, specification, artwork and production capacity.