
Safe Areas for Roller Banner Designs: Keep Key Content Visible
Oct 08, 2026
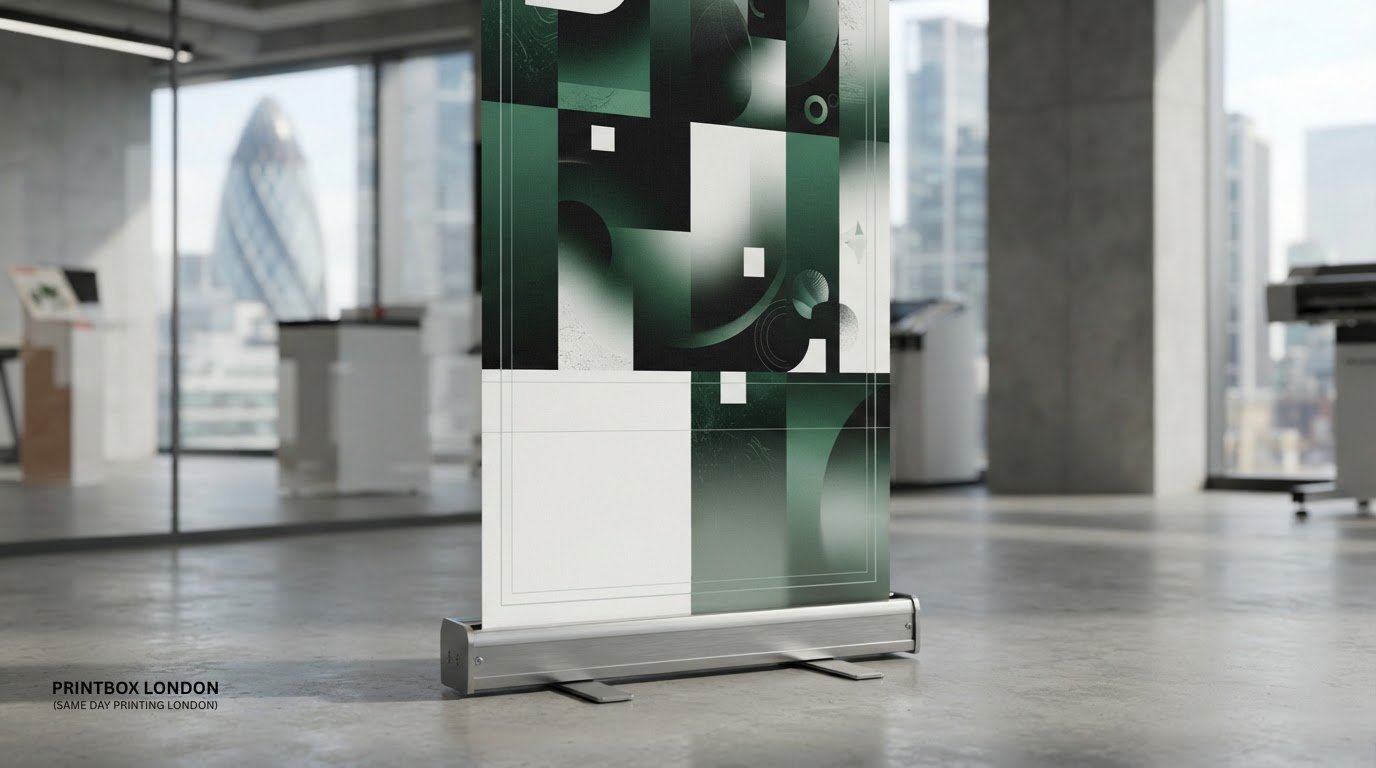
What if the same margin that protects one roller banner leaves another’s logo hidden in the base? Safe areas for roller banner designs depend on the stand’s template and the way people will read your content, so one fixed measurement isn’t reliable for every job.
It’s sensible to worry about text sitting too close to an edge or disappearing into the cassette. Keep essential details, such as your logo, headline and contact information, clear of the areas affected by the banner’s hardware. Use the artwork template for the specific banner to check its finished size and how much of the bottom will be concealed.
This guide explains safe area, bleed and trim in plain English, then shows how to organise key information so it stays clear and readable from a distance. You’ll also learn what to check in your print-ready artwork before ordering a roller banner, including why background artwork and important content need different treatment. With the right template and a clear layout, you can prepare your file with more confidence.
Key Takeaways
- Safe areas for roller banner designs depend on the chosen stand, so use its template to locate the finished edges and concealed base area.
- Keep your logo, headline and essential contact details inside the template’s safe area, where they’re less likely to be hidden or cut off.
- Choose a focused layout with a clear message, or use a more information-led approach when the content calls for it.
- Before exporting, check the artwork’s finished size, image quality, fonts, colour and safe margins.
- Printbox London (Same Day Printing London) prints roller banners for events, exhibitions, retail and promotions.
What safe areas for roller banner designs protect from cut-off content
The safe area is the part of a roller banner graphic where essential text and visual details should sit, clear of the edges and any hardware that could cover them. Keep logos, contact details and calls to action outside risky areas. If they sit too close to an edge or fall into the section concealed by the base, they may be difficult to read or disappear from view once the banner is assembled.
Safe area, bleed and trim describe different parts of the artwork. They aren’t interchangeable, and mixing them up can leave important content exposed to cutting or concealment.
Safe area, bleed and trim: what each term means
The safe area is the region reserved for important text and visual elements. Bleed is artwork that extends beyond the final cut edge when the job requires it, helping the background reach the edge after finishing. Trim is the finished edge after excess artwork is removed. Bleed (printing) explains the term in more detail.
In practical terms, keep essential content inside the safe area, while background colour or imagery can extend into the bleed when the artwork requirements call for it. The trim line shows where the finished edge will be. Don’t place a logo or small print across that line simply because it appears on your design canvas.
Why the roller banner base changes the usable layout
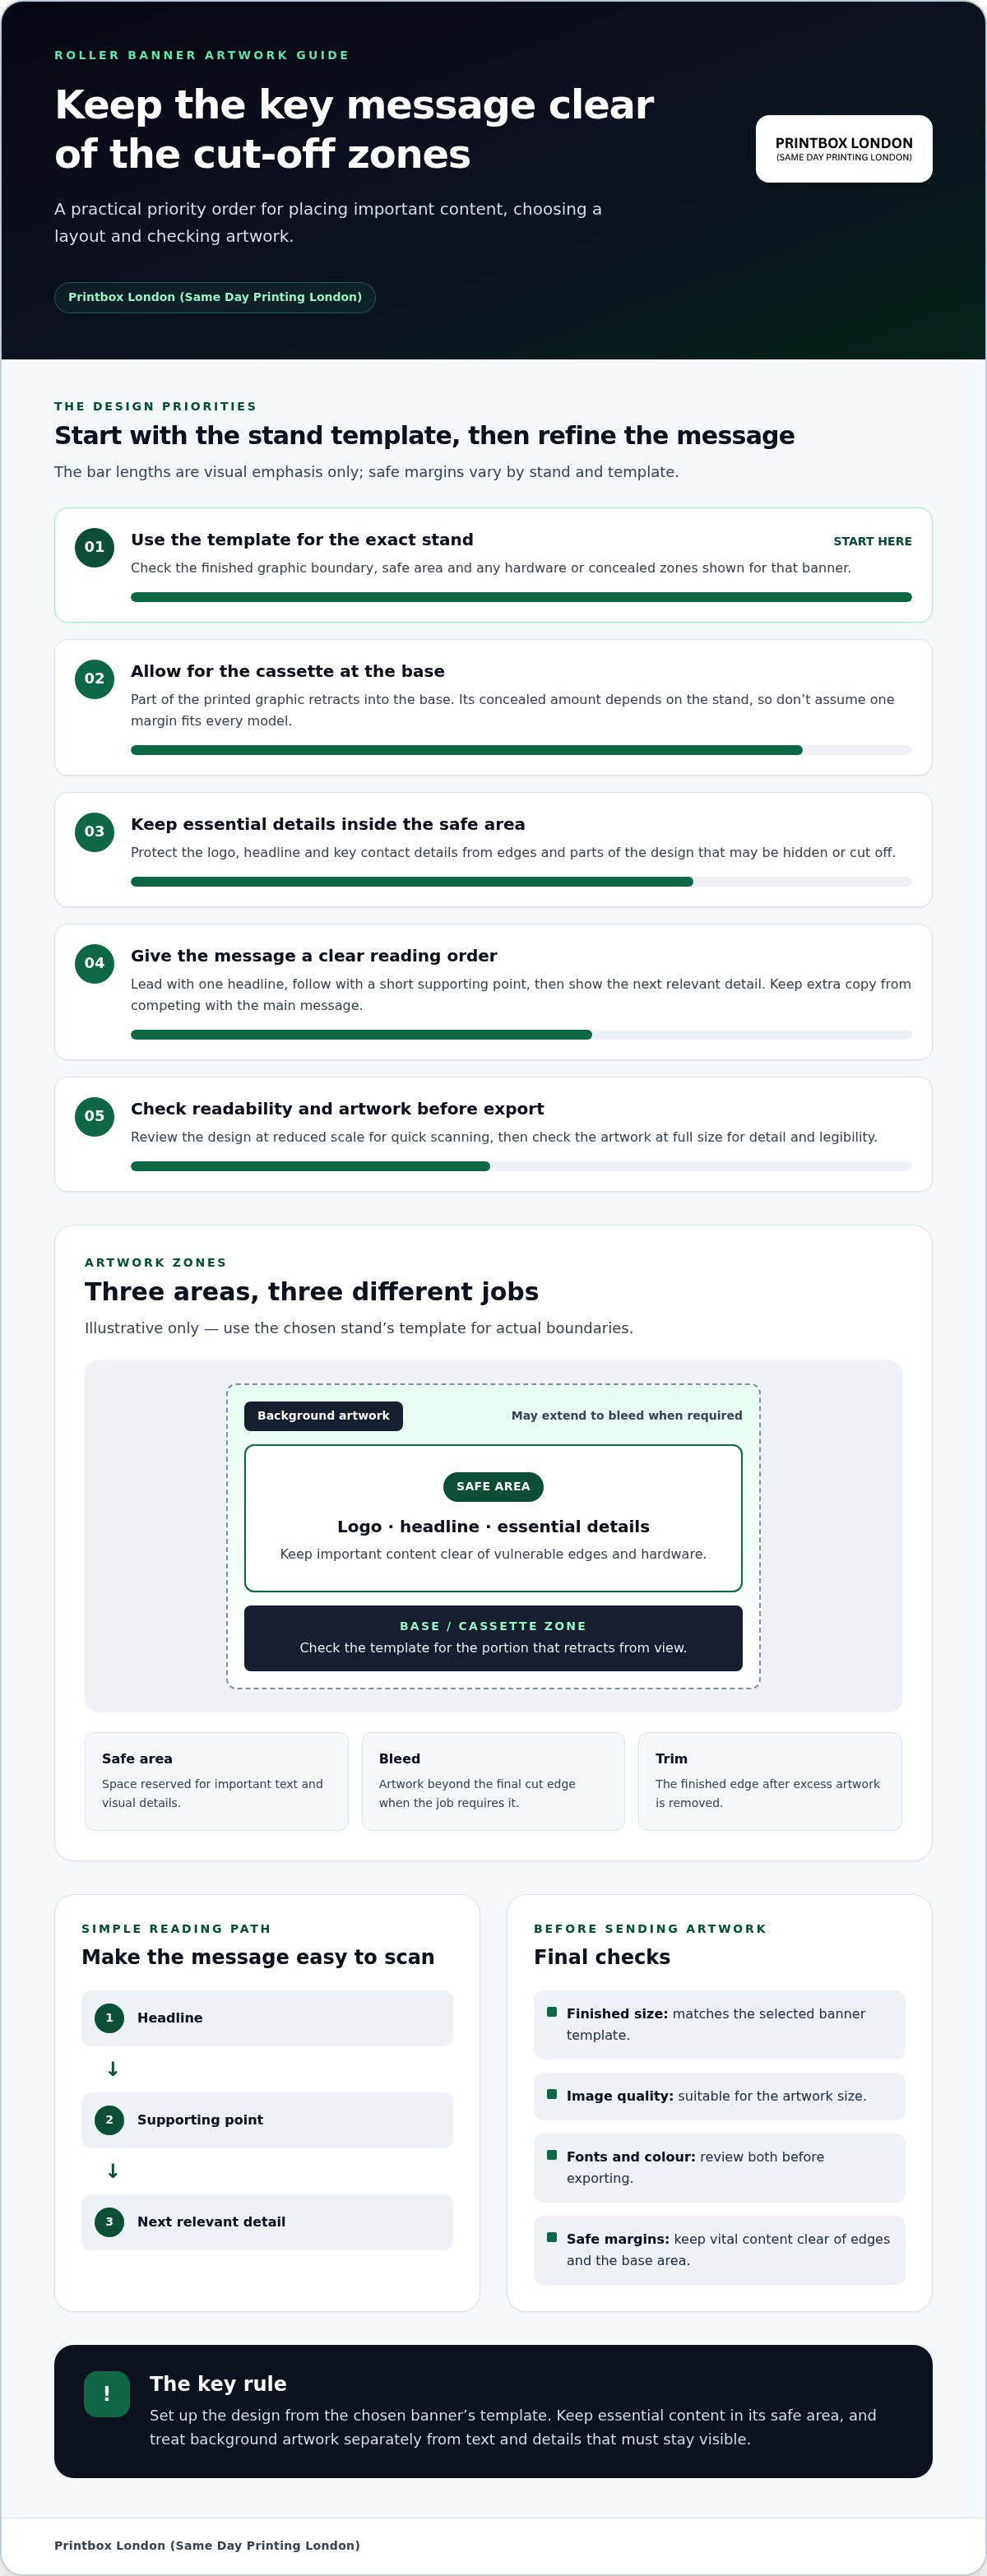
A roller banner’s printed graphic retracts into a cassette at the bottom. Once assembled, part of the graphic can sit inside the base and won’t be visible. The amount concealed depends on the particular stand, so don’t assume one safe margin works for every model. Use the template for the exact banner format to identify the finished size and concealed area.
Check the template before arranging the layout, not after. A headline or logo placed low on the canvas may look balanced on screen but end up hidden when the banner is fitted. Also keep essential details comfortably clear of other edges and hardware shown in the template. Treat its guides as instructions for that specific graphic, rather than applying a margin copied from another design.
- Find the finished graphic boundary and any marked safe area.
- Identify the portion that retracts into the base.
- Keep background artwork separate from text and other essential details.
If you’re considering a wider format, the wider roller banner option still needs artwork prepared to its own template. Check the chosen graphic and stand together before setting margins; the usable layout follows the template, not a universal measurement.
How to place text and images inside a roller banner safe area
Start with the message, not the empty space. A banner is easier to scan when it has one clear headline, a short supporting message and an obvious next step. Keep the logo and other essential details within the safe area shown on the chosen template. The safe areas for roller banner designs help protect that content, but a strong hierarchy helps people understand it quickly.
Decide what someone should notice first, then remove anything that competes with it. If the banner promotes an event, for example, the event name might lead, with a brief detail and website address supporting it. Avoid squeezing in every service, offer or contact method. Extra copy can make the key message harder to find.
Build a top-to-bottom visual hierarchy
Place the main message where it will be noticed quickly, while keeping it within the template’s safe area. Give it more visual weight than supporting details through size, position or contrast. A logo and strong image can establish identity; secondary copy should explain, not compete. Keep names, web addresses and calls to action legible and clear of the base area.
Think of the layout as a short reading path: first the headline, then the supporting point, then the next step. This order should still make sense if someone only glances at the banner. Keep decorative shapes and background imagery more flexible near edges or low on the design, where they’re less costly to crop or conceal than a key detail.
Make banner text readable at a glance
Use short phrases and familiar wording. A banner isn’t the place for a paragraph of small print. Check that text stands out against the area behind it, including where an image or pattern runs underneath. Strong contrast can help separate the message; low-contrast text may blend into the background, even if it looks clear on a bright screen.
Review the design at reduced on-screen scale to mimic how it may appear from further away. If the headline disappears or the supporting text becomes a dense block, simplify or strengthen the hierarchy. Then inspect the artwork at full size for details that still need to be readable up close.
- Keep the headline and main image visually dominant.
- Use a concise supporting message rather than a list of details.
- Keep contact information and the next step inside the template’s safe area.
- Let non-essential decorative elements sit closer to vulnerable edges.
The right balance depends on the message and the selected format. A simple promotion may need only a headline and one action, whilst an information-led display may need a little more copy. As you compare roller banner options, consider whether the chosen format gives the headline, image and supporting details enough room to follow a clear reading path.
For a practical review of your layout before placing an order, talk to Printbox London (Same Day Printing London) about your banner artwork.
Choose a roller banner layout that fits the stand and message
Choose the format around the job the banner needs to do. A focused display for a quick glance calls for a different composition from one designed to share several pieces of information. In both cases, start with the exact finished dimensions and artwork template for the selected banner. Don’t build your canvas around an assumed standard size, then try to make the artwork fit afterwards.
Safe areas for roller banner designs help protect important content, but the layout also needs to suit the available space. Browse the roller banner options when deciding which format fits your display plan, and use its template to position the artwork.
When a simple layout is the stronger choice
If people need to understand the message quickly, make one headline and one focused visual do most of the work. A short supporting line or clear next step can add useful context. Removing secondary details reduces visual competition and gives the main message room to stand out.
A full-bleed background can still extend to the edges where the template allows, but keep the headline, logo and essential details inside its safe area. A striking image won’t compensate for a call to action that’s too close to the edge or concealed by the stand.
When a wider format needs a different composition
A wider canvas can offer more room for imagery and copy, depending on the chosen product. Use that space to reorganise the composition, not simply to stretch a narrow design sideways. For example, you might balance a headline and image alongside each other, while keeping the logo and key details clear and easy to follow.
Give the wider format its own artwork layout. Check the supplied template for the finished size and safe area, then place every essential element accordingly. Don’t transfer margins or positioning from another banner and assume they’ll suit this one. The wider roller banner format needs artwork prepared for its own canvas.
Roller and PVC banners suit different display setups, so decide how and where the graphic will be used before settling on a layout. A design intended for a retractable stand needs to account for that stand’s hardware; a PVC banner has a different setup. Keep the intended format in mind from the first draft, rather than treating every banner as the same canvas.
Before finalising the design, check:
- Does the headline communicate the main point without relying on smaller copy?
- Does the image support the message instead of competing with it?
- Are the logo, contact details and next step inside the chosen template’s safe area?
- Has the artwork been built to the exact finished dimensions for that banner?
A layout that fits both the message and the stand is easier to scan and less likely to lose important details. Make the format decision first, then compose the artwork to match.
Prepare and check roller banner artwork before sending it to print
A reliable artwork check follows a clear order: select the roller banner, use its template, place the content, export the file, then inspect the export. This helps catch size and layout issues before they affect the finished graphic. Keep the template for the chosen product to hand throughout the process, as its guides take priority over general advice about margins or bleed.
Requirements can vary between banner products. Don’t add bleed, crop marks or other setup details based on assumptions. Follow the selected product’s artwork instructions, and make sure the document is built to the stated finished dimensions rather than resized at the last moment.
A practical artwork check before export
Start by matching the document dimensions to the selected banner. Check the logo, headline and other essential content against the template’s safe area, including the portion affected by the base. Review images at their intended print size, and make sure text remains clear rather than crowded or too small to read.
Then check colour settings and fonts against the product requirements. Export a print-ready PDF where suitable, and open that exported file separately from the design programme. Look for missing or substituted fonts, shifted elements, unexpected blank areas and anything that has moved outside the guides.
What to send with the print-ready file
Make the order details clear so the artwork can be considered alongside the job requirements. Include the selected finished size and quantity, plus any relevant finishing information. If timing matters, state the deadline and whether you prefer collection or delivery when requesting the job.
Same-day printing is available for selected quantities and specifications. Turnaround depends on artwork readiness and the job requirements, so a file that follows the template and arrives with clear order details helps move the process forward.
Use this final checklist before sending the file:
- Product: the artwork matches the selected banner and its exact template.
- Layout: key content sits safely within the guides and remains readable.
- Images and fonts: visuals are suitable at the intended size, and text displays as designed in the exported PDF.
- Export: the file opens correctly, with no misplaced content or unintended blank areas.
- Order details: size, quantity, deadline and collection or delivery preference are stated.
These checks help prepare a print-ready file without treating one set of artwork rules as universal. For roller banner printing in London, share the selected product details and reviewed artwork with Printbox London (Same Day Printing London).
Get roller banner artwork ready for printing in London
Before ordering, make sure the artwork matches the selected banner’s template, the message has a clear visual hierarchy, and essential content sits within the safe area. Check the exported file too, rather than relying only on how the design looks in your editing software. These final checks help reduce the risk of key information being hidden or misplaced in the finished graphic.
Printbox London (Same Day Printing London) prints roller banners for events, exhibitions, retail and promotions. Same-day printing is available for selected quantities and specifications; turnaround depends on the artwork and job requirements. Share the order details early, especially if you’re working to an event date.
What to include when asking about a banner job
Make your request clear and practical. State the roller banner format and quantity, then provide the final print-ready artwork prepared for that product. If you have a question about the template or file setup, include it with the artwork so the point can be considered alongside the job.
Give the deadline you’re working towards and note your collection or delivery preference. Clear information helps establish what the job involves and what timing is needed. It also avoids relying on an assumed size, quantity or file version.
A practical next step for London customers
Customers can collect confirmed-ready orders from the Tottenham shop. If collection is your preference, allow for the order to be confirmed ready before making plans. Don’t treat same-day printing as an unconditional completion promise: it’s available for selected quantities and specifications, and the turnaround depends on the specific job.
When you get in touch, have the finished size, quantity, artwork and required deadline to hand. A clear brief makes it easier to discuss the banner as a complete order, from the selected format through to the file you’ve prepared.
- Format and quantity: identify the banner you want and how many you need.
- Artwork: send the reviewed final file, built to the relevant template.
- Timing: state your deadline so the required turnaround is clear.
- Collection or delivery: mention your preference when discussing the order.
With the correct template, protected content, a clear layout and a checked export, you’re ready to move from design to print. For customers arranging roller banner printing in London, provide the details together so the job can be discussed without guesswork.
Take your banner design from screen to stand
Think about the role the banner will play in the space. At an exhibition, it might introduce your organisation; in a shop, it could draw attention to a promotion. Deciding what you want visitors to do next gives the finished design a clear purpose beyond simply filling a display space.
Printbox London (Same Day Printing London) prints roller banners for exhibitions, events, retail and promotions. Same-day printing is available for selected quantities and specifications, with turnaround dependent on the job.
Have your artwork and order details ready, including the intended use and required deadline. That gives you a practical starting point for discussing the right banner arrangement.
With your next step planned, you can move ahead and bring your display idea into the space where it needs to be seen.
Frequently Asked Questions
What is a safe area on a roller banner?
It’s the template-marked zone intended for content that must remain visible, such as a headline or event details. In your design software, keep the template guide on a separate, non-printing layer if the file allows it. That makes it easier to check alignment as you edit without accidentally including guide lines in the exported artwork. Follow the template’s instructions for handling those guides.
How much of the bottom of a roller banner is hidden?
The concealed amount varies by stand, so there isn’t a reliable universal measurement. Use the template for the selected banner rather than estimating from its overall height or copying a margin from another file. If you’re adapting artwork, check that the template matches the stand you’ll order before moving or resizing any lower content. A different format can have a different visible area.
Is the safe area the same as bleed on a roller banner?
No. The safe area is for protecting important design elements; bleed is extra artwork outside the finished edge when the product’s setup calls for it. If the template shows both guides, use them for separate purposes: keep essential content in the safe zone and extend edge backgrounds as instructed. Also check whether the template’s guide marks should be hidden or removed in the final export.
Can I put a logo at the bottom of a roller banner?
Yes, if the chosen template shows that position within the visible area. Consider the logo’s full lock-up, including any tagline or small lettering, rather than checking only the symbol. If those details become difficult to distinguish at the intended viewing distance, use a simpler logo version or choose a clearer position. A preview of the assembled banner can help you judge the result.
What file format should I use for roller banner artwork?
A print-ready PDF is generally the preferred format. Export it from your design software, then open the PDF itself to check that it displays as intended. Avoid sending a screenshot of the design as a substitute for the artwork file. If you’re preparing a file in another format, follow the specific instructions for the banner product so the artwork can be assessed in the correct context.
Should a roller banner design use a different layout from a PVC banner?
Usually, prepare a separate layout for each product. Their display setups and finished formats differ, so an unchanged design may not suit both. Keep clearly named files for each banner type and check the intended product before exporting or sending artwork. This simple file-management step helps prevent a PVC banner design being supplied for a roller stand, or the reverse, particularly when several versions are in progress.
Article by
Printbox London Team
The Printbox London (Same Day Printing London) team provides practical printing guidance based on real customer requirements and day-to-day print production. We serve customers across Greater London from our Tottenham print shop, with same-day printing available for many products depending on quantity, specification, artwork and production capacity.