
How to Hang a Foamex Sign: A Practical Step-by-Step Guide
Oct 09, 2026
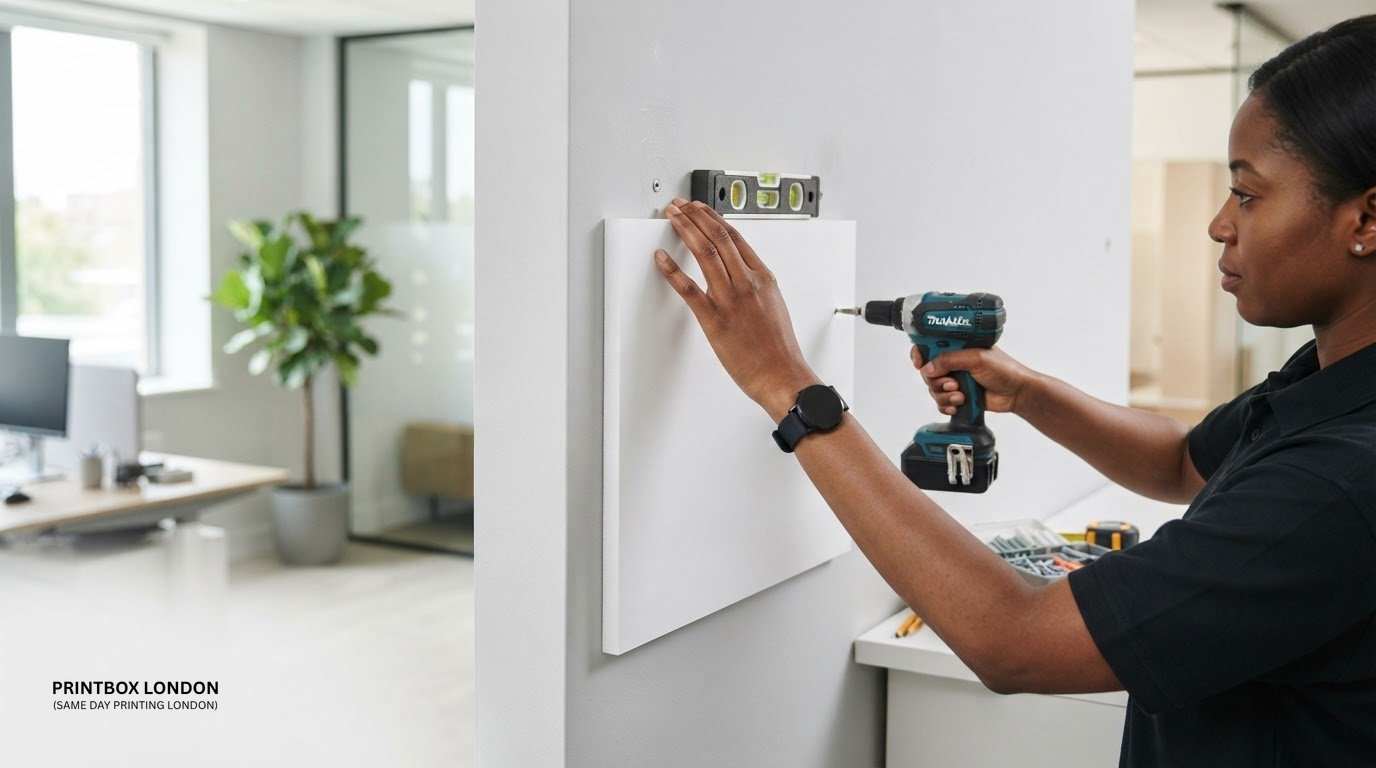
The right fixing depends on the wall, the sign’s size and where it will be displayed. Even a lightweight Foamex sign can slip, mark a wall or become damaged if it is mounted with unsuitable tape or screws.
If you’re deciding how to hang a foamex sign, first check the wall surface and the display location. Adhesive fixings can suit some small signs on clean, smooth indoor surfaces. Mechanical fixings may be more appropriate for other walls or longer-term displays, but they need to suit both the wall and the board.
This guide explains how to assess the location, compare fixing methods, prepare the surfaces and check the finished display. The key is to follow the fixing manufacturer’s instructions and not assume one method will work for every board and wall.
Printbox London (Same Day Printing London) produces rigid foam board displays in sizes from A4 to A0. White 5 mm foam board is a common option. Foam board is for indoor use and is not waterproof, so choose a dry, sheltered display position. The linked pages cover passport photos in London and American passport, visa and ID photos in London.
Key Takeaways
- Choose a fixing to suit the wall surface, sign size and how long the display needs to stay in place.
- For how to hang a foamex sign without avoidable damage, check and prepare both the board and the wall first.
- Gather compatible fixings and tools before starting, then position the sign carefully and check it is level.
- Look out for lifting adhesive, loose fixings or a bending panel. If the sign becomes unstable, support it and reassess the installation.
- Foam board is intended for indoor use, so plan the display away from weather and persistent damp.
Before hanging a Foamex sign: check the board, wall and location
Before choosing a mounting method, inspect the board, the wall and the spot where the sign will sit. Check that the position is dry and protected from weather. Consider nearby heat, regular knocks and doors that might catch the edge. A suitable fixing cannot compensate for a location that exposes the board to conditions it is not designed for.
Check the board for damage, existing holes and any mounting hardware. Measure it and compare its dimensions with the available wall space. Printbox London (Same Day Printing London) produces rigid foam board displays for indoor use. The board and fixing need to suit the display conditions and the intended position.
Is the location suitable for a Foamex sign?
Choose a dry position away from weather exposure and persistent damp. Think about activity around the display: a board beside a busy doorway could be bumped, while a swinging door may catch its edge. Avoid placing it where regular contact could loosen the fixings or damage the panel.
Check that visitors can see the sign from the direction they are likely to approach. Furniture, an open door or another display can block the message. Also make sure the position can be reached safely when you install the board.
What to check before choosing a fixing
Identify the wall finish, such as painted plaster, plasterboard, tile or masonry, but do not assume the wall’s strength from its appearance. Look for possible cables or services near any proposed drilling point. If you cannot establish whether drilling is safe, do not guess.
Measure the position and mark it lightly. Check the layout before drilling or applying adhesive, and consider whether the chosen fixing could damage the surface. Follow the fixing manufacturer’s instructions for the wall and board. Gather compatible materials and tools before you begin.
Choose how to hang a Foamex sign: adhesive, screws or temporary fixings
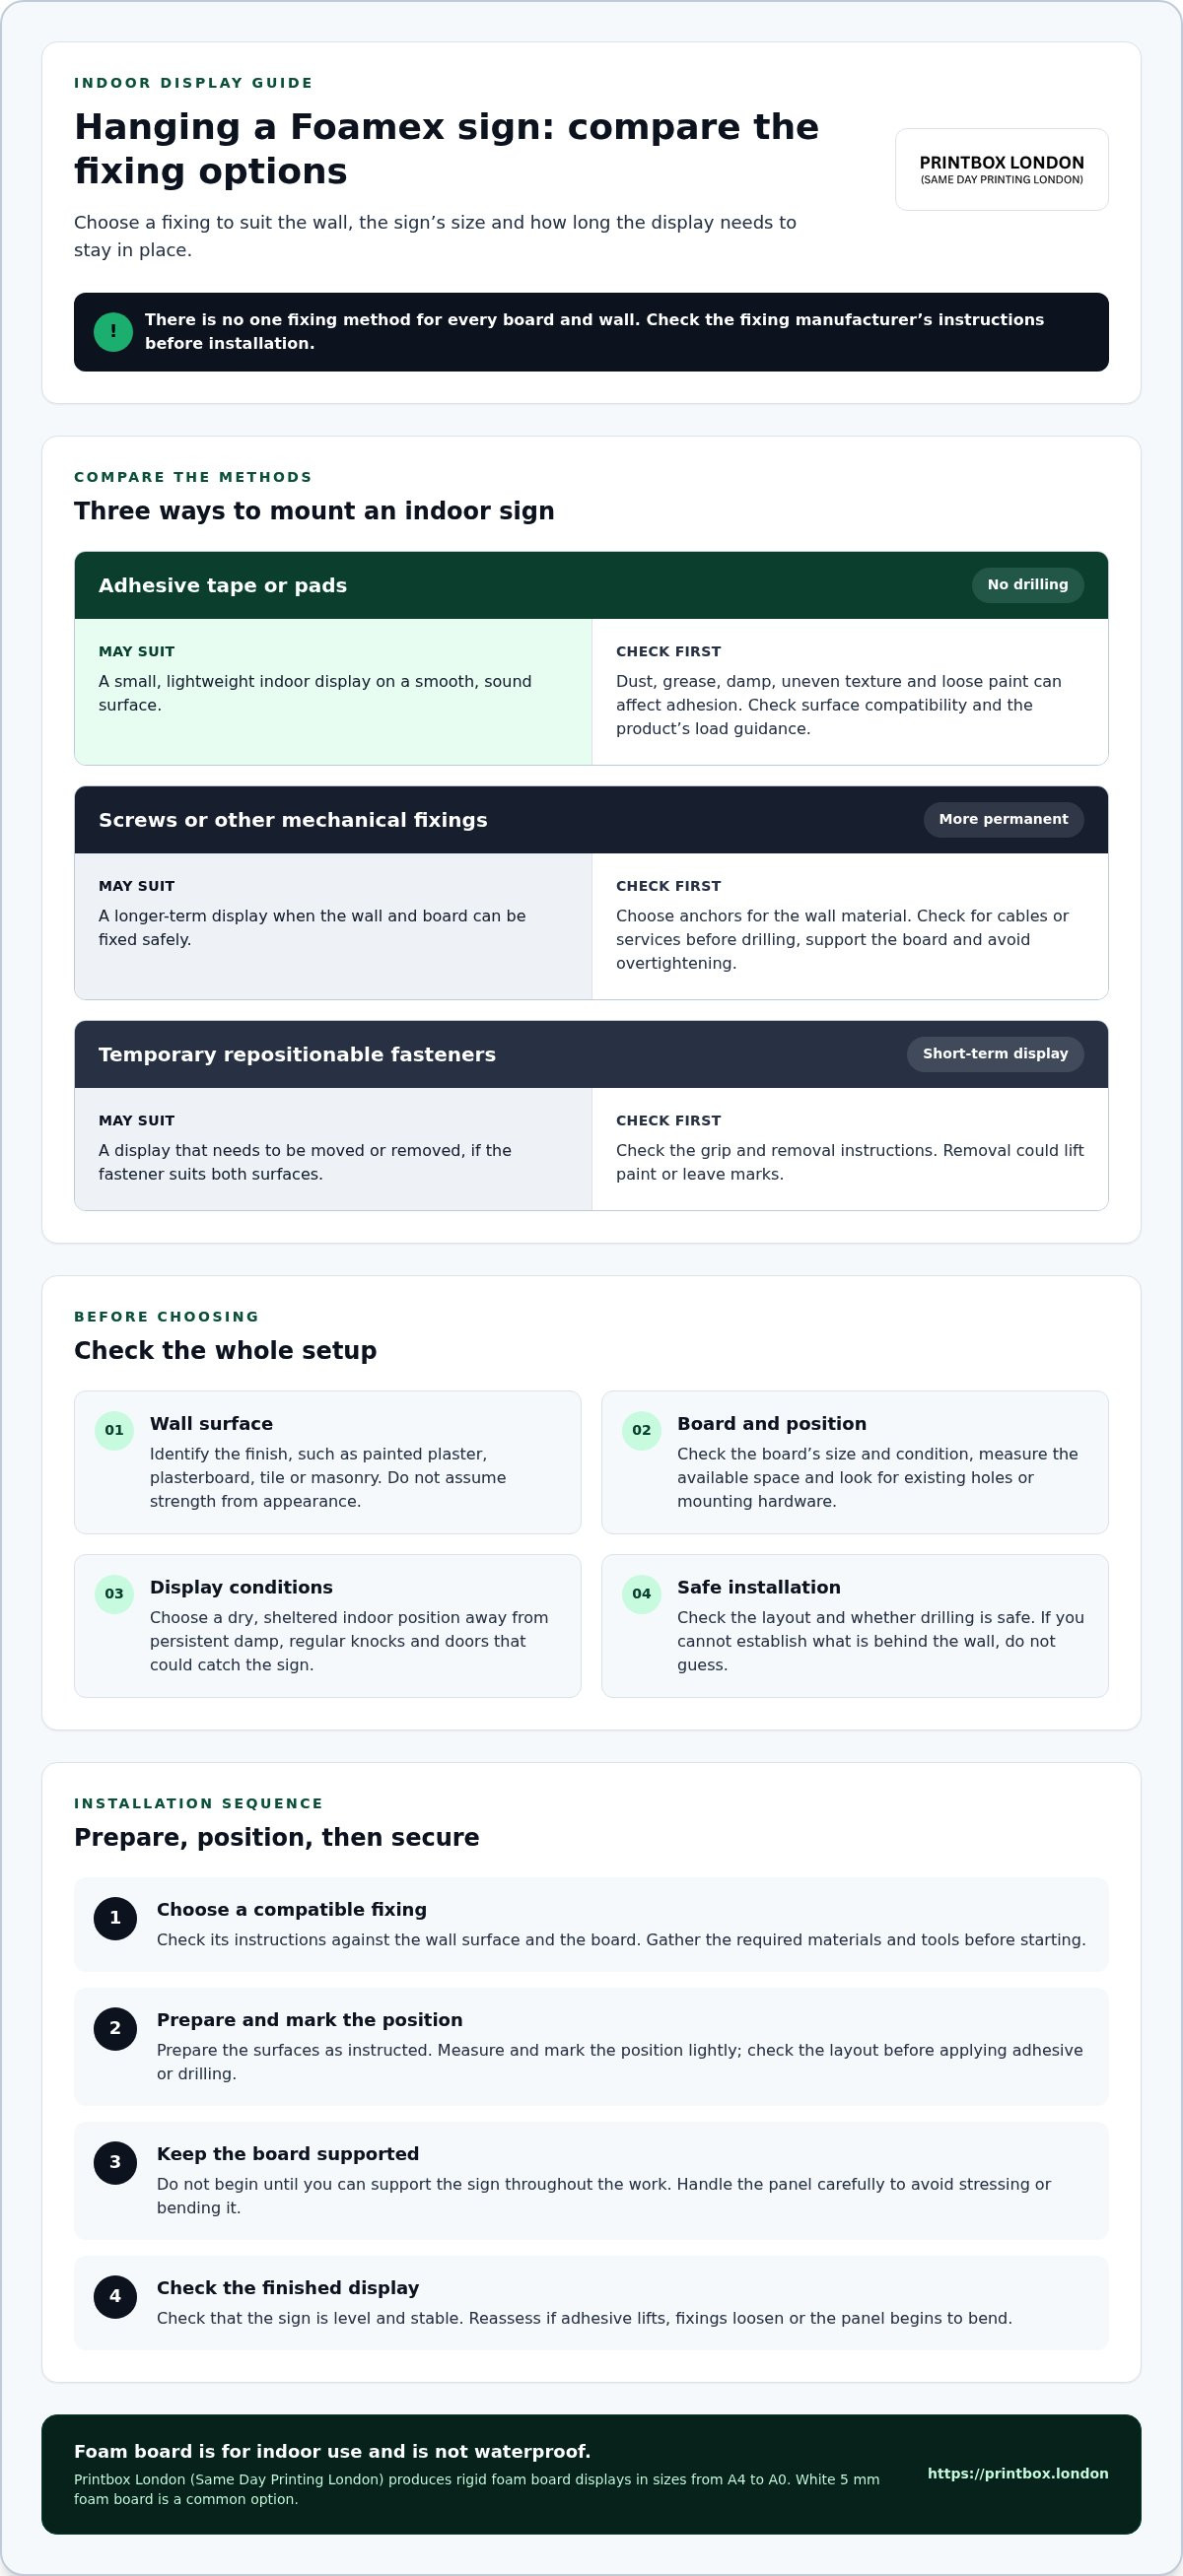
The right fixing depends on the wall, the board’s size and how long you need the sign to remain in place. Adhesive can avoid drilling, but it relies on a compatible, well-prepared surface. Screws or other mechanical fixings connect the board to the wall, but need suitable anchors and careful handling. Temporary fasteners can suit displays that need to be moved, provided they are suitable for both surfaces.
Use the comparison below to narrow down the options. Then check the fixing manufacturer’s instructions for your specific wall and sign.
Adhesive tape or pads
These may suit a small, lightweight indoor display on a smooth, sound surface. Texture, dust, grease, damp and loose paint can affect adhesion. Check the product’s surface compatibility and load guidance. Do not assume one adhesive product will hold every sign.
Screws or other mechanical fixings
These may suit a longer-term display when the wall and board can be fixed safely. The wall material determines the appropriate anchor, and the board must be supported and handled carefully. Holes are permanent, and overtightening can damage the panel.
Temporary repositionable fasteners
These may suit a short-term display that needs to be repositioned or removed. Their grip depends on the wall finish and board, so check that the product is intended for both. Consider whether removal could lift paint or leave marks.
Consider the whole setup rather than the fixing alone. A smooth tiled wall may be easier to clean than textured or flaking paint, but drilling into tile brings different risks. A wall that looks solid does not show what is behind it. If you are unsure about the wall construction or drilling, do not proceed by guesswork.
When adhesive mounting may suit an indoor display
Adhesive is sensitive to the surface. The wall should be clean and dry, with sound paint or finish. Dust, grease, uneven texture and peeling paint can weaken contact. Read the product instructions for surface compatibility, application and load guidance. Where appropriate, test discreetly before fixing the sign. Avoid valuable or fragile finishes if adhesive removal could damage them, and do not rely on adhesive if the product or surface is unsuitable.
When mechanical or temporary fixings make more sense
Screws, hangers and repositionable fasteners must suit both the board and the wall. For mechanical fixings, use anchors appropriate to the wall material, make holes carefully and avoid tightening so much that the board is stressed. For temporary fasteners, check the removal instructions as well as the grip. These checks help you decide how to hang a foamex sign without treating one method as right for every installation.
Planning a printed indoor display? Contact Printbox London (Same Day Printing London) with the intended board size and display requirements to discuss your print project.
How to hang a Foamex sign step by step
Once you have chosen a suitable fixing, gather the materials and tools before starting. Depending on the method, you may need a tape measure, pencil, spirit level and the tools specified by the fixing manufacturer. For drilling, use equipment suitable for the wall and board. Do not begin until you can keep the sign supported throughout the work.
Follow this sequence to position the sign accurately and avoid putting unnecessary strain on the panel:
- Choose the method. Check the fixing instructions against the wall surface and board. Confirm you have the correct adhesive or anchors, along with the tools required.
- Position the sign. Hold or temporarily support it at the intended height. Step back to check that it is visible and clear of doors, furniture and other obstructions.
- Prepare the area. Measure the position, mark the fixing points lightly and check the alignment with a level. Prepare the wall only as directed by the fixing manufacturer.
- Attach the fixings. Apply adhesive or install mechanical fixings as instructed. Keep the panel supported while you work.
- Inspect the result. Check that the sign sits flat and level, and that each fixing is secure without pulling, bending or forcing the board.
Mark and prepare the position
Measure from a consistent reference point, such as the edge of a wall feature, to keep the sign in the intended position. Mark the fixing locations lightly, then hold the board in place again to verify its orientation and alignment before applying adhesive or drilling. Check the marks against the fixing layout and instructions. Do not add holes to compensate for a position you have not rechecked.
Clear the work area and keep the board supported rather than resting it against an edge. If the fixing requires a clean or prepared surface, follow its instructions and allow the area to dry if specified. Avoid improvising with extra adhesive or hardware.
Attach the sign and check the result
Fit the sign steadily, matching it to the prepared fixing points without twisting the panel. With adhesive, press or hold it only as the product instructions direct. With screws, tighten carefully and stop if the panel flexes or shows signs of stress. For a larger board, arrange suitable help so it remains supported while you work.
Before leaving the sign on display, check along the edges and across the face. Look for gaps from the wall, lifting adhesive, loose fixings or a tilted position. If anything moves or appears strained, support the sign and reassess the fixing rather than forcing the board into place. A final check helps ensure how to hang a foamex sign ends with a tidy, stable display, without avoidable damage to the panel or wall.
Avoid common Foamex sign hanging problems and fix them safely
A sign that slips, tilts or pulls away from the wall needs attention. Do not try to fix a loose display by adding more adhesive, extra hardware or unsupported weight. Support the sign and reassess the board, wall and fixing instructions before it falls or causes further damage.
Common warning signs include:
- Lifting adhesive: An edge or fixing point begins to peel away from the wall.
- A loose fixing: A screw, hanger or temporary fastener moves, or the board shifts when lightly touched.
- Uneven placement: The sign tilts or no longer sits flat against the wall.
- A bending panel: The board bows, flexes or appears strained around a fixing point.
Why can a sign slip, tilt or lift from the wall?
Adhesive may lose grip if a surface is dusty, greasy, textured, damp or poorly painted, or if the product is used contrary to its instructions. Mechanical fixings can loosen when they are unsuitable for the wall or have not been installed securely. Uneven support can also leave the panel sitting at an angle, putting extra strain on some fixing points.
If the board starts to flex, stop applying pressure. Support it and remove it carefully if you can do so safely. Recheck whether the wall and fixing method suit the sign. Larger or awkwardly positioned boards need proper support during fitting and display. Do not guess at a weight limit or assume one fixing arrangement suits every panel.
How to reduce damage when taking a sign down
Wall damage and board damage are separate risks. Adhesive removal may lift paint or affect a delicate finish, while pulling the sign sharply can bend or crack the board. Follow the fixing manufacturer’s removal guidance. Work gradually, supporting the panel as you release each attachment, and do not yank it away from the wall.
If a fixing will not release as directed, pause rather than levering against the printed face or wall. Once the sign is down, inspect both the board and the surface. Adhesives and wall finishes vary, so a mark-free result cannot be guaranteed. For a future display, consider how easily the surface can be repaired before choosing a fixing.
A secure display depends on the complete setup, not just the board. If you need the printed panel, Printbox London (Same Day Printing London) produces foam board displays for indoor use.
Plan an indoor Foamex sign display with Printbox London (Same Day Printing London)
Before arranging a print, settle the message, finished dimensions and display position. Measure the available wall space and consider the viewing distance, nearby furniture and the direction visitors will approach from. These details help you choose a board size and prepare artwork to fit. Choose mounting hardware separately to suit the specific wall and installation conditions.
Printbox London (Same Day Printing London) produces rigid foam board displays in sizes from A4 to A0. White 5 mm foam board is a common option for indoor display. Keep in mind that foam board is not waterproof when deciding where to place it.
What to include when planning a printed sign
Gather the main job details before arranging the print. A clear brief helps match the artwork to the purpose and finished display:
- Finished size: Provide the required width and height, based on the available space.
- Quantity: State how many boards you need.
- Artwork: Supply the file for printing and check that its layout matches the finished dimensions.
- Purpose: Explain what the sign needs to communicate, such as directions, product information or venue details.
Leave clear space around important wording so it remains readable near the edge. Consider the sign’s position and surroundings when choosing text size and contrast. Keep fixing requirements in mind, but select mounting hardware for the actual wall and installation conditions.
A clear next step for a London print job
Send the finished size, quantity, artwork and intended use to Printbox London (Same Day Printing London). Same-day printing is available for selected quantities and specifications. Turnaround depends on the order and production requirements.
Printbox London (Same Day Printing London) serves customers across Greater London, including Central, North, East, South and West London, and areas such as Haringey, Hackney, Islington, Camden, Enfield, Barnet, Westminster, Newham, Redbridge and Waltham Forest. The physical shop is at 52 West Green Road, South Tottenham, London N15 5NR. Collection is from the Tottenham shop once the order is confirmed ready. With the print details organised, you can plan the installation around the wall and fixing method, then check the position before mounting the board.
Get your indoor sign ready for its next step
Before finalising the display, decide what visitors should notice or understand first. A clear message and uncluttered layout make a sign easier to use in a shop or venue. Prepare the artwork for the intended finished size, and check that important text and details are easy to read from the viewing position.
Bring the artwork, quantity and intended use together before arranging the print. If you are still deciding how to hang a foamex sign, account for the wall and fixing conditions as part of the display plan, rather than treating installation as an afterthought.
Share your board size, quantity and artwork to discuss your indoor sign printing with Printbox London (Same Day Printing London).
Frequently Asked Questions
Can I hang a Foamex sign with double-sided tape?
Yes, if the tape is intended for both the board and the wall finish. Before committing, test a small piece in an inconspicuous spot and check whether it affects the surface or loses grip. Follow the tape manufacturer’s instructions for application and bonding time. If the display uses several panels, assess the fixing points for each one rather than assuming one test confirms every point is secure.
Can a Foamex sign be used outdoors?
No. Foam board is for indoor display, not an exposed shopfront or outdoor event sign. If an entrance is exposed to rain or persistent damp, position the board well inside rather than relying on an awning or brief cover. Plan the message around an indoor viewing point so the sign is not exposed to outdoor conditions.
How do I hang a Foamex sign without drilling?
To hang a Foamex sign without drilling, consider an adhesive or removable fastener only if its instructions cover the board and wall finish. In a rented shop or temporary venue, check that attaching a sign to the surface is permitted. Read the product’s use and removal guidance before installation, and keep the instructions in case you need to take the display down.
Can I screw directly into a Foamex board?
Do not assume a screw can be driven directly into the board without damage. Use a mounting arrangement designed to hold the panel without crushing or splitting it, and follow its instructions. If the board has existing mounting points, check that they suit the fixing you plan to use. Avoid making new holes or using a screw head that presses directly against the printed face.
How can I make sure my Foamex sign hangs straight?
For a set of signs, align each one to the same fixed reference, such as a measured line, instead of judging every position separately. Check the result from the entrance or main approach, where visitors will see the display. A group of signs can look level up close but inconsistent across a wall, so adjust the planned positions before permanently fixing the first board.
Can I remove a Foamex sign without damaging the wall?
Damage-free removal cannot be guaranteed. Clear the area beneath the sign and move anything that could be marked if the board shifts. Keep the removal instructions to hand, especially if the fixing uses adhesive. Do not use a solvent or cleaning product on residue unless its instructions confirm it is suitable for that wall finish and will not affect the sign.
What should I do if my Foamex sign starts to come loose?
Keep people clear of the area beneath the sign, especially if it is above a counter or walkway. Do not leave a visibly unstable panel on display. Support it or take it down if you can do so safely, then inspect the fixing and wall before putting it back. If you cannot handle the sign safely from where you are, get appropriate help rather than attempting an unstable repair.

Article by
Printbox London Team
The Printbox London (Same Day Printing London) team provides practical printing guidance based on real customer requirements and day-to-day print production. We serve customers across Greater London from our Tottenham print shop, with same-day printing available for many products depending on quantity, specification, artwork and production capacity.