
Exhibition Display Board Printing for London Events
Oct 23, 2026
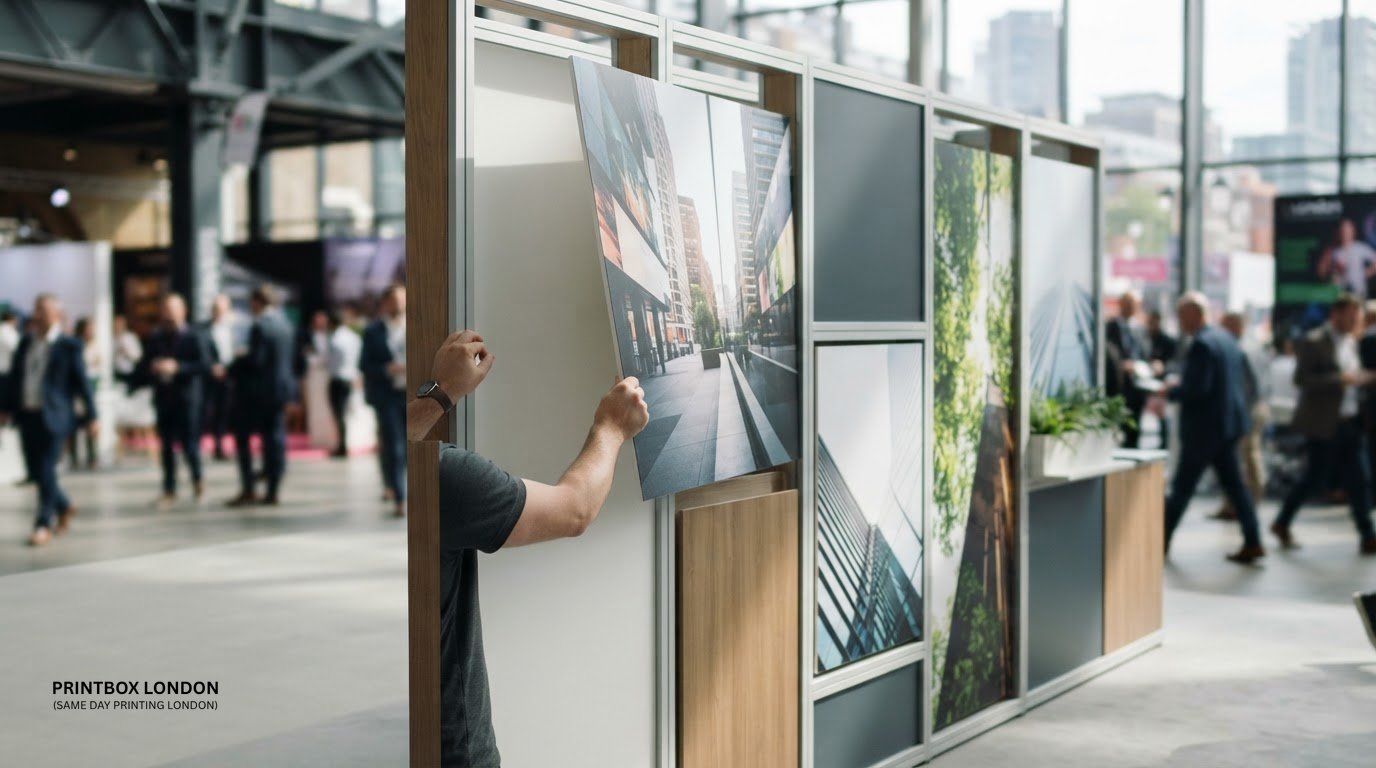
An exhibition display board is a rigid panel printed with your message, images or branding. Exhibition display board printing turns artwork into a physical display for a stand, event or presentation. Choose the board material to suit where and how the panel will be displayed.
Material, thickness and artwork setup all affect the finished display. Indoor panels and outdoor signage have different requirements, so decide where the board will be used before preparing your file.
This guide covers board materials, thickness and artwork checks, including why finished dimensions, image quality and viewing distance matter. It also explains when a rigid board may suit your event better than another large-format display option.
Key Takeaways
- Choose a rigid display panel to suit where it will be shown, how it will be mounted and whether it needs to withstand outdoor conditions.
- Compare materials and thicknesses carefully: the right option depends on the display’s purpose, handling and installation needs.
- Prepare artwork at the finished dimensions, with clear text and images suited to the viewing distance.
- Decide whether single-sided or double-sided printing and a particular surface finish will work best for your display.
- For a useful quote, have the board size, quantity, material preference and artwork ready to share.
Exhibition panels and large-format graphics
Exhibition panels give a stand structure, while large-format graphics carry messages across wider surfaces. At a trade show, a panel might introduce a business, explain a service or direct visitors to a demonstration. Plan the format around the stand layout, then prepare artwork for each panel. A design made for one wide surface may not divide cleanly across separate sections.
For a shell scheme, map the available wall sections before designing. Keep headings, logos and contact details within each panel’s visible area. Use the header panel above the main graphics for a short identifier, not detailed copy. Check the organiser’s stand specifications for panel dimensions and attachment positions, as these affect artwork alignment and safe text placement.
For folding or portable displays, make sure the layout reads when the panels are opened and closed. Keep important words and images away from folds, joins and edges. A product image across a crease, for example, may look broken when assembled. Prepare separate artwork sections, label each file clearly and check the sequence before submitting. A lightweight format can simplify transport, but the board must still suit the setup.
Early-years role-play panels use graphics to define a play area. A shopfront, clinic or café scene can create a recognisable setting. Keep the main image and labels clear at the intended viewing distance. Simple groupings, such as a counter graphic beside a shop sign, make essential details easier to follow.
For a modular display, plan the panels in the order visitors will encounter them: introduction first, supporting information next, and the main action last. Use a shared colour palette and consistent headings to connect the sections. Each panel should also make sense on its own, as visitors may approach from either side. Check image resolution at the finished size, and consider how viewing distance affects detail.
Before submitting artwork, compare each panel’s finished dimensions with the stand specifications. A print-ready PDF helps preserve the layout, but check image quality, text placement and panel order. Label files by position, such as “left”, “centre” or “right”, so the intended sequence is clear when several graphics form one display.
What is a display board?
A display board is a rigid panel carrying printed text, images or branding. It can stand alone, attach to a structure or form part of a larger exhibition layout. One panel might introduce a business while another explains a product. Unlike a flexible poster, the board provides a rigid surface for the graphics. The board size, surface and display setup all affect the material choice.
Display board prices depend on the order’s size, material, quantity and finishing. The price is provided after a quote request, with those specifications determining the cost. A single panel and a coordinated set involve different quantities and production requirements. For a useful quote, prepare the finished dimensions, number of panels, preferred material and whether each face needs printing. Include the artwork too, if it’s ready. These details make it easier to price the actual job rather than a generic board.
Quantity planning starts with the stand layout. Count each separate panel, then identify whether any designs repeat. A trade show stand might need one main graphic and several supporting panels. Repeated artwork may simplify file preparation, while different designs need clear labels and dimensions. Requesting a matching set also helps keep colours, text and image placement consistent across the display. Keep a final panel list beside the artwork files, so the requested quantity and design versions are clear.
Double-sided printing suits a board that visitors will see from both sides, such as a freestanding panel in an open exhibition space. Decide what each direction should show before preparing the files. The reverse can repeat the front or carry different information: the front might display a service name, while the reverse gives a short explanation. Foamex boards can be printed on one or both sides. Check the orientation and viewing position before submitting artwork.
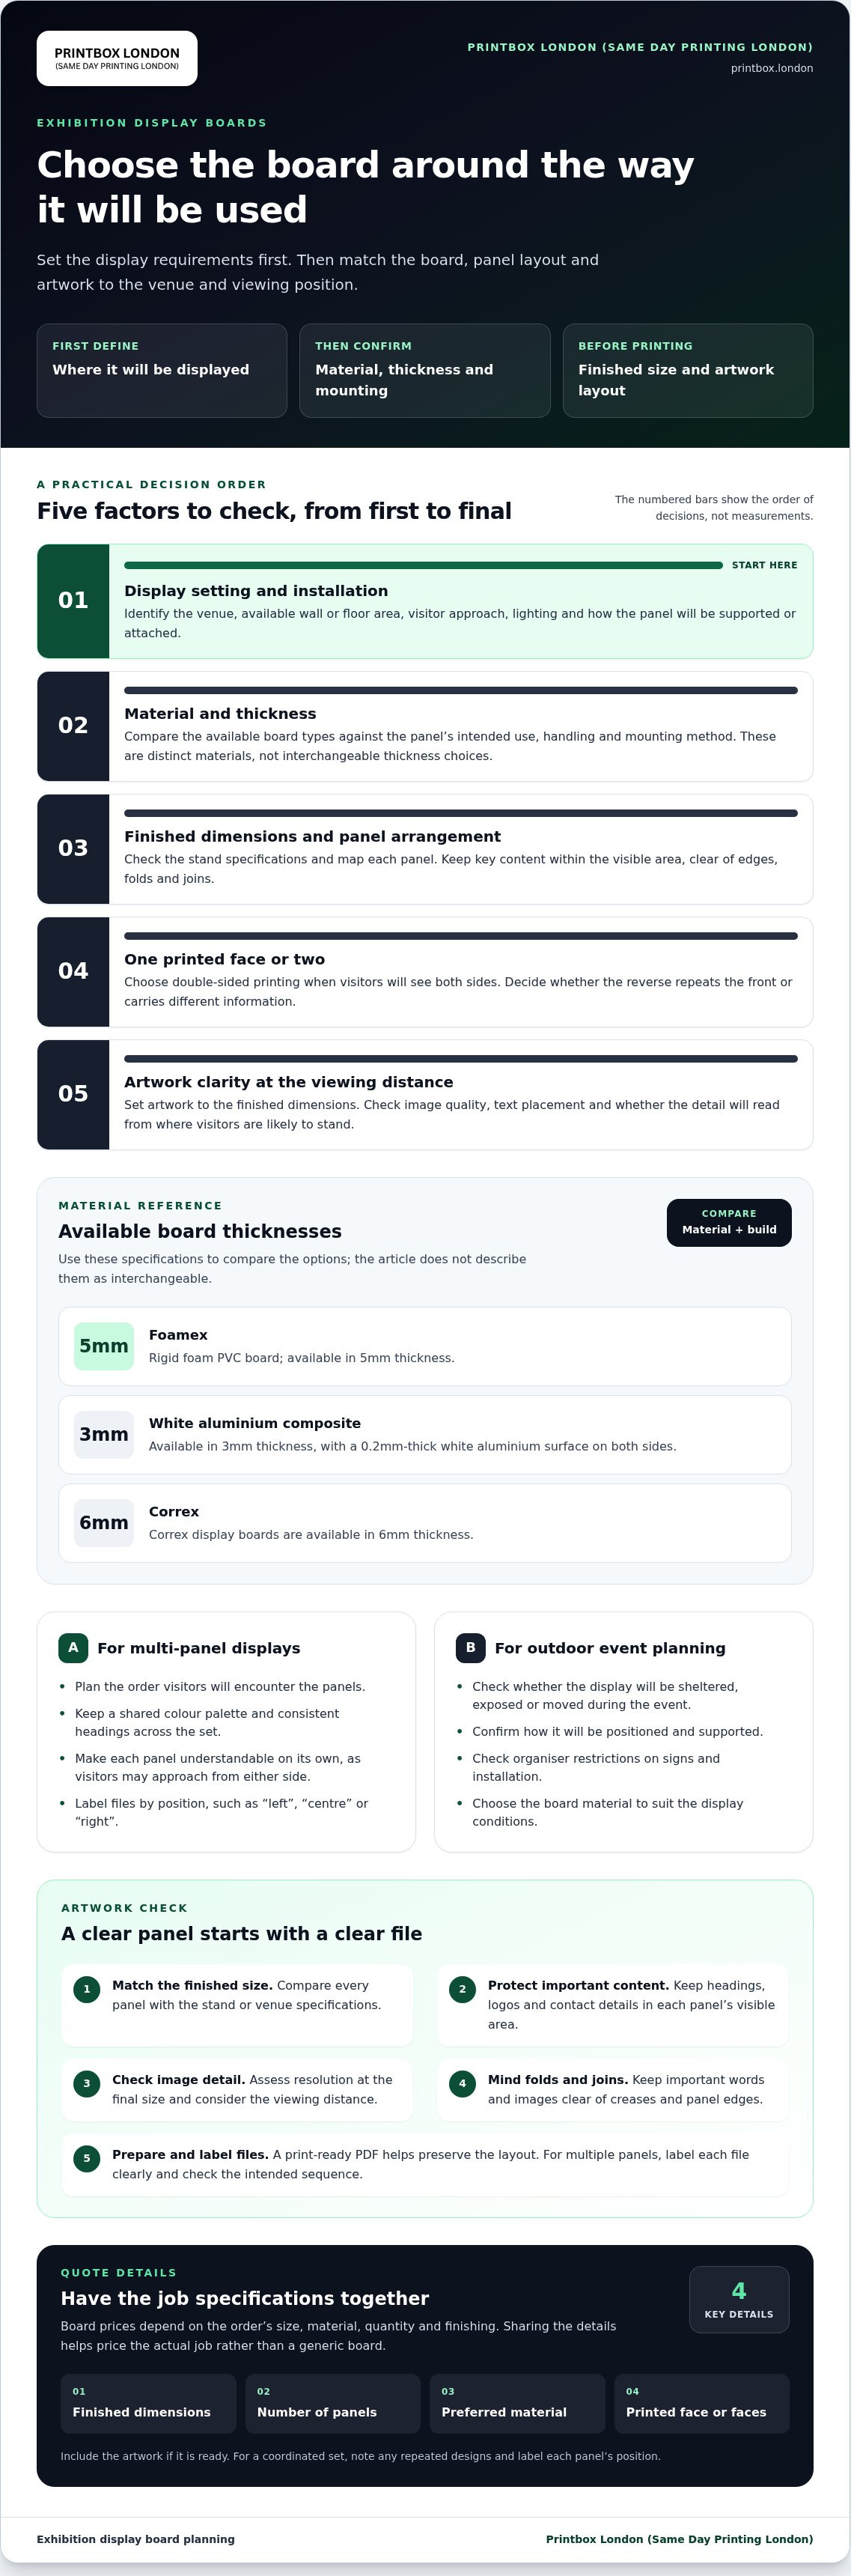
Thickness affects how a panel feels and how it fits its display. Foamex, a rigid foam PVC, is available in 5mm thickness. White aluminium composite boards are available in 3mm thickness, with a 0.2mm-thick white aluminium surface on both sides. Correx display boards are available in 6mm thickness. These are distinct materials, not interchangeable thickness choices for one board. Compare the panel’s intended use, handling and mounting method when choosing. The foam board options provide a relevant starting point for considering rigid panels.
For a quote, share the panel dimensions, quantity, material preference and single- or double-sided artwork through the contact page. A print-ready file helps clarify how the finished panels should look.
Indoor use and outdoor alternatives
Choose a display format by assessing the event location before preparing artwork. A conference room, covered foyer and open-air exhibition space each present different practical conditions. Note the available wall or floor area, lighting, visitor approach and installation method. A narrow indoor aisle may suit a tall, compact graphic, while a broad event space may call for a display visible across a longer sightline. Include these details in the production brief.
Indoor panels work well where a venue provides a stable surface or defined stand structure. Check whether the organiser allows fixings, freestanding supports or temporary attachments. A venue plan can show where doors, screens and furniture might block the display. Position the main message where visitors can see it along the natural route through the space, and keep the graphic clear of nearby signage.
Outdoor events need extra planning. Check whether the display will be sheltered, exposed or moved during the event. Confirm how it will be positioned and supported, and whether the organiser has restrictions on signs or temporary displays. The artwork alone cannot make a panel suitable for its location: the fixing method, surface and exposure to changing conditions all affect the setup.
A banner may suit an installation where a rigid panel does not fit the plan. For example, a venue with limited wall space might allow a banner in a designated display area. Compare the available hanging or support points with the banner’s finished format. Keep the message concise, as a banner viewed from a distance needs a different layout from a panel beside a product display.
Prepare artwork for its actual viewing position. Use a clear visual hierarchy: a main message, supporting detail and recognisable brand mark. Near a registration desk, the event name may be the priority. For a graphic viewed from further away, short wording and strong contrast help the message stand out. Check that colours and text remain distinct against the venue background, whether it is a pale wall or a busy exhibition stand.
Before production, note the location, display format, mounting plan and event schedule. Share the organiser’s display rules with the artwork team to align the design with the venue and avoid last-minute changes. If the display will move between an indoor presentation and an outdoor event, plan each setup separately rather than assuming one arrangement will suit both.
Board materials and thicknesses
Choose a board by matching its material and thickness to the display plan, not by thickness alone. A trade show brief should identify the stand structure, panel dimensions, how each board will be supported and whether visitors will see both faces. These details narrow the specification before artwork is prepared and give the printer a clear description of the finished panels.
For a shell scheme, start with the organiser’s display instructions. Record each usable panel area and note the position of joins, frames and attachment points. Decide whether graphics will cover individual sections or form one connected layout. This affects board sizes and where the artwork should be divided. The material must fit the stand’s physical arrangement.
Thickness is the board’s depth, so specify it alongside the material and finished dimensions. This gives the production team a precise instruction. Avoid a request that says only “rigid board”. Name the material and thickness, then state the required size and print sides. Keep those details consistent across every panel in a multi-board order.
Consider handling between events as well as the display itself. If panels will be transported, note how they will be packed, carried and stored. If they will stay in one venue, focus on the support and installation method. These practical details help identify a suitable specification. The material choice should reflect how panels will be moved or fitted.
Print quality also depends on artwork matching the final panel. Set up the document at the finished dimensions and check that logos, photographs and text remain sharp at that size. For a modular trade show display, keep colours and typography consistent across files. Label each design by position, such as “left panel” or “header”, to preserve the planned sequence during production and installation.
Before approving a specification, compare the material, thickness and mounting approach against the venue plan. Ask the organiser for the display requirements, then record any limits or fitting details in the job notes. If the stand changes, update the dimensions and artwork together. This avoids sending files prepared for an earlier layout and keeps the chosen board format aligned with the actual display.
Organise the production note in this order: material, thickness, finished dimensions, number of panels, print sides and mounting method. Add the artwork file names and panel positions. For a set of promotional graphics, list each different design separately. This makes the specification easier to review and reduces ambiguity before production.
Which printing and finishing options are available, such as matt, gloss or lamination?
Printed display boards use UV-cured inks: ultraviolet light cures the ink during printing, helping form the image on the board surface. The visible result still depends on the artwork, material and viewing conditions. A clear logo with strong contrast, for example, is easier to read across an exhibition space than small, tightly packed text.
Matt and gloss describe surface appearances, not different board materials. Matt has less shine, which can reduce distracting reflections under exhibition lighting. Gloss is shinier and can make colours appear more vivid. Under bright venue spotlights, glare may affect how easily visitors can read a message. Consider the stand’s lighting and viewing angle before choosing a finish.
Lamination applies a protective film over printed artwork. It changes the surface appearance and adds a layer over the print. Its suitability depends on the board material, display and finishing specification. A promotional panel handled repeatedly, for example, may have different finishing needs from a graphic mounted behind a reception desk. Treat lamination as a separate production choice rather than assuming every board includes it.
Single-sided printing places the design on one face; double-sided printing uses both. Choose based on how visitors will approach the display. A board against a wall usually shows one face, while a freestanding panel may be viewed from either direction. Decide what each side should communicate before finishing the artwork. Align the reverse design so it reads correctly from that side.
Before sending files, review the finished size, image resolution, colours and text. A print-ready PDF can preserve the artwork layout, but inspect it at full size. Check logos, fine lines and small text closely. Avoid enlarging a small image to fill a large panel, as it may lose detail. Keep important elements within the intended print area.
Use this finishing checklist for each panel:
- Surface: decide whether a matt or gloss appearance suits the lighting and artwork.
- Print sides: state whether the design goes on one face or both.
- Protection: include lamination in the specification where it suits the board and use.
- File review: inspect text, images and layout at the finished dimensions.
Clear instructions help keep the print, surface and artwork aligned. Send the panel dimensions, preferred appearance, print sides and file together as one job specification. If you’re preparing display boards and need help with the print details, contact the team about your board artwork.
Printbox London (Same Day Printing London): Same Day Printing
Printbox London (Same Day Printing London) helps London event organisers prepare printed materials when deadlines are tight. Same-day printing is available for many products, with turnaround depending on the order’s quantity and specification. For exhibition support, same-day poster printing, flyer printing and business card printing can help complete your event materials.
For an urgent job, share the product, quantity, finished size and print-ready artwork. Include your deadline and finishing requirements so the order can be assessed against its production needs. A correctly prepared PDF makes the next steps clearer, but the file must still suit the chosen product.
For event printing in London, contact Printbox London (Same Day Printing London) or visit printbox.london.
Get your event print brief ready
Prepare a clear production brief with the event name, stand plan, final copy, artwork files and the person approving the design. Keep one agreed version of each file, with names that identify the panel or graphic. This makes revisions easier to track and helps prevent an outdated draft reaching production.
Treat exhibition display board printing as part of the wider event identity. Check that each panel works alongside your other materials, from the first visitor-facing graphic to the information people take away. A consistent visual direction helps the display feel considered rather than assembled at the last minute.
For an urgent project, include your required date and complete order details in your enquiry. Printbox London (Same Day Printing London) can then understand the job and the timing involved. A well-prepared brief gives your event materials a focused start.
With the details organised, you’re ready to move from planning to print.
Frequently Asked Questions
Can I add eyelets or hanging holes to these signs?
Don’t assume a display board includes eyelets or drilled holes. The right attachment depends on the board, its position and the stand or support system. A panel in a fitted exhibition frame may need no holes, while a suspended sign needs a suitable hanging plan. Specify the fixing method before finalising artwork, and keep logos and text clear of intended fixing points.
How do you print exhibition graphics and what is the print quality like?
Exhibition graphics are printed onto the selected board using UV-cured inks. Print quality depends on the source artwork, board surface and viewing distance. Use original photographs and vector logos where possible, rather than screenshots or images copied from small online previews. Review colour, fine text and gradients in the supplied file, as these details can look different on a large panel.
What types of exhibition display boards can be printed in the UK?
Options include rigid foam board panels, Foamex boards and Correx boards. One panel can carry a main message, or several can form a coordinated exhibition display. Choose the format to suit the stand structure, display location and visitor approach. A panel mounted against a wall, for example, has different layout needs from a freestanding board viewed from both sides.
How much does exhibition display board printing cost in the UK?
The cost depends on finished dimensions, board quantity, material and finishing. A set of differently sized panels has different production requirements from repeated copies of one design. For a relevant quote, provide the quantity, final sizes, material preference, print sides and artwork. Printbox London (Same Day Printing London) provides pricing based on the job specification.
What sizes and materials are available for exhibition display boards?
Foam boards are available in A4 to A0 formats, and custom finished dimensions can be considered where production allows. Material options include foam board, Foamex and Correx, with thickness varying by board type. A0 measures 841 × 1189 mm, whilst A1 measures 594 × 841 mm. Match the finished size to your stand plan, allowing space for frames, joins or other display fittings.
What artwork file formats, resolution and bleed are required for display board printing?
PDF is the preferred artwork format; JPG or JPEG, PNG and TIFF are also accepted. Prepare raster images at 300 dpi at final size, and use CMYK colour where possible. A 3 mm bleed is common, but it isn’t universal for every product. Set the document to the required finished dimensions and keep important text inside a safe margin, away from the trim edge.
How long does exhibition display board printing and delivery take in the UK?
Turnaround depends on the quantity, board specification, artwork readiness and production workload. Same-day printing is available for selected quantities and specifications, so include your required date when arranging the job. Collect from the Tottenham shop once your order is confirmed ready. Same-day local courier delivery across London may be available depending on postcode, job size, completion time and courier availability.
How do foam board, Correx, Foamex and cardboard display boards compare?
Foam board is for indoor use and is not waterproof. Foamex is rigid foam PVC, while Correx is a fluted plastic board; their construction and thickness differ. Cardboard is paper-based, so it is not interchangeable with plastic or foam boards. Choose according to display location, handling and support method. An indoor presentation panel and an outdoor sign, for example, have different material requirements.
Article by
Printbox London Team
The Printbox London (Same Day Printing London) team provides practical printing guidance based on real customer requirements and day-to-day print production. We serve customers across Greater London from our Tottenham print shop, with same-day printing available for many products depending on quantity, specification, artwork and production capacity.