
Bleed vs Safe Area for Printing: Trim Explained | Printbox
Oct 10, 2026
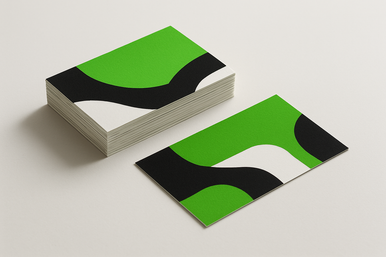
Bleed extends backgrounds beyond the finished edge; the safe area keeps important content inside it. The trim line sits between them and marks where the printed sheet will be cut. These three boundaries help you prepare artwork that reaches the edge without putting text, logos or other essential details too close to the cut.
You may see instructions asking for 3 mm bleed and a 3 mm safety margin. They describe two different measurements on opposite sides of the trim line—not one shared margin. Those figures are a common starting point for some printed items, not a universal rule or a confirmed Printbox specification. Always follow the requirements for your particular job.
By Printbox London Team
Key takeaways
- Trim: the intended finished edge of the print.
- Bleed: extra background artwork outside the trim, removed during cutting.
- Safe area: space inside the trim where essential content should sit.
- Confirm bleed, safety margins and any fold requirements before exporting your PDF.
Understanding trim, bleed and safe area
Trim: the finished size
The trim line defines the intended edge of the finished item. For example, a design with a finished size of 100 × 150 mm should measure 100 × 150 mm after trimming. The trim line is a layout boundary, not a visible border to print on your design.
Bleed: background beyond the edge
Cutting can vary slightly. If a photograph or coloured background stops exactly at the trim line, a small shift can expose an unwanted white sliver. Extending that background into the bleed gives the cut room to move while still passing through printed artwork.
Bleed is intended to be cut off. Do not put essential text or logos there, and do not create bleed by adding a white frame around an edge-to-edge design.
Safe area: protection for important content
The safe area is inside the finished edge. Keep headings, contact details, logos and QR codes comfortably within it. For QR codes, also retain the clear space required around the code itself; a safety margin is not a substitute for that clear space.
A minimum safety margin helps reduce cutting risks, but it is not necessarily the best visual spacing. Giving text more breathing room can make a design easier to read.
How 3 mm bleed and 3 mm safety work
Consider a hypothetical flat print with a 100 × 150 mm finished size, where the job instructions specify 3 mm bleed on every side and a 3 mm minimum safety margin.
- The trim size remains 100 × 150 mm.
- The artwork including bleed extends to 106 × 156 mm: add 3 mm to each of the two sides in both dimensions.
- The area inset 3 mm from every trimmed edge measures 94 × 144 mm.
From the outside towards the centre, the order is: bleed edge → trim line → safe-area boundary. In this example, the bleed edge and safe-area boundary are 6 mm apart along each side, with the trim line halfway between them.
These dimensions illustrate the principle only. Different products, finishing methods or templates may require different margins. Folded leaflets also need attention to panel sizes and fold positions.
Preparing your artwork
- Confirm the finished size and specifications. Ask for the required bleed, minimum safety margin and any template before setting up the file.
- Set the document to its trim size. Where your design software supports it, enter bleed separately rather than enlarging the page and guessing the cutting position.
- Extend edge-to-edge backgrounds. Carry photographs and colour blocks all the way to the outer bleed boundary.
- Keep important content inside the safe area. Check both sides of double-sided artwork, plus any folds or other finishing boundaries.
- Export a print-ready PDF. Include the specified bleed. Add crop marks only if requested; they identify the trim position but do not create bleed.
The same distinction matters when preparing flyers or poster artwork, although the required margins must be confirmed for each job. For folded designs, use the supplied layout rather than assuming all panels are equal.
Common mistakes to avoid
- Adding bleed without extending the design: an empty bleed area cannot protect an edge-to-edge background.
- Stretching the entire layout: enlarging everything can distort images or push important content towards the cut.
- Using very narrow borders: small trimming variations can make a border look uneven even when text remains safe.
- Leaving guides in the artwork: safety and fold guides should not appear as printed lines unless they are deliberately part of the design.
- Checking only the working file: export settings can omit bleed, so inspect the final PDF too.
Before you send your PDF
Check the finished dimensions, confirm that backgrounds extend through the required bleed, and make sure essential content stays inside the agreed safety margin. Review spelling, page order and both sides of the design. Inspect images at their intended print size rather than relying on a small on-screen preview.
For flyer and leaflet printing, send your intended finished size, whether the item is flat or folded, and your artwork. Ask Printbox London (Same Day Printing London) to confirm the relevant file requirements before your final export. If you have a deadline, confirm availability for your exact job: same-day printing is available for selected quantities and specifications, not as an unconditional guarantee.